Step-by-step preparations of the input files for MHS-CBAU
Authors: Clément Hardy1
Affiliations: 1Université du Québec en Outaouais (UQO)

Now that we have seen how MHS-CBAU works, here is a step-by-step on how to generate and prepare all of the files for your simulation.
Again, this is not a step-by-step of how the scripts work; we’ve seen that in the previous section.
Here, we’re talking about what you need to do, in practice, to generate all of the files and get them ready so that you can use MHS-CBAU in your study landscape.
About this step-by-step
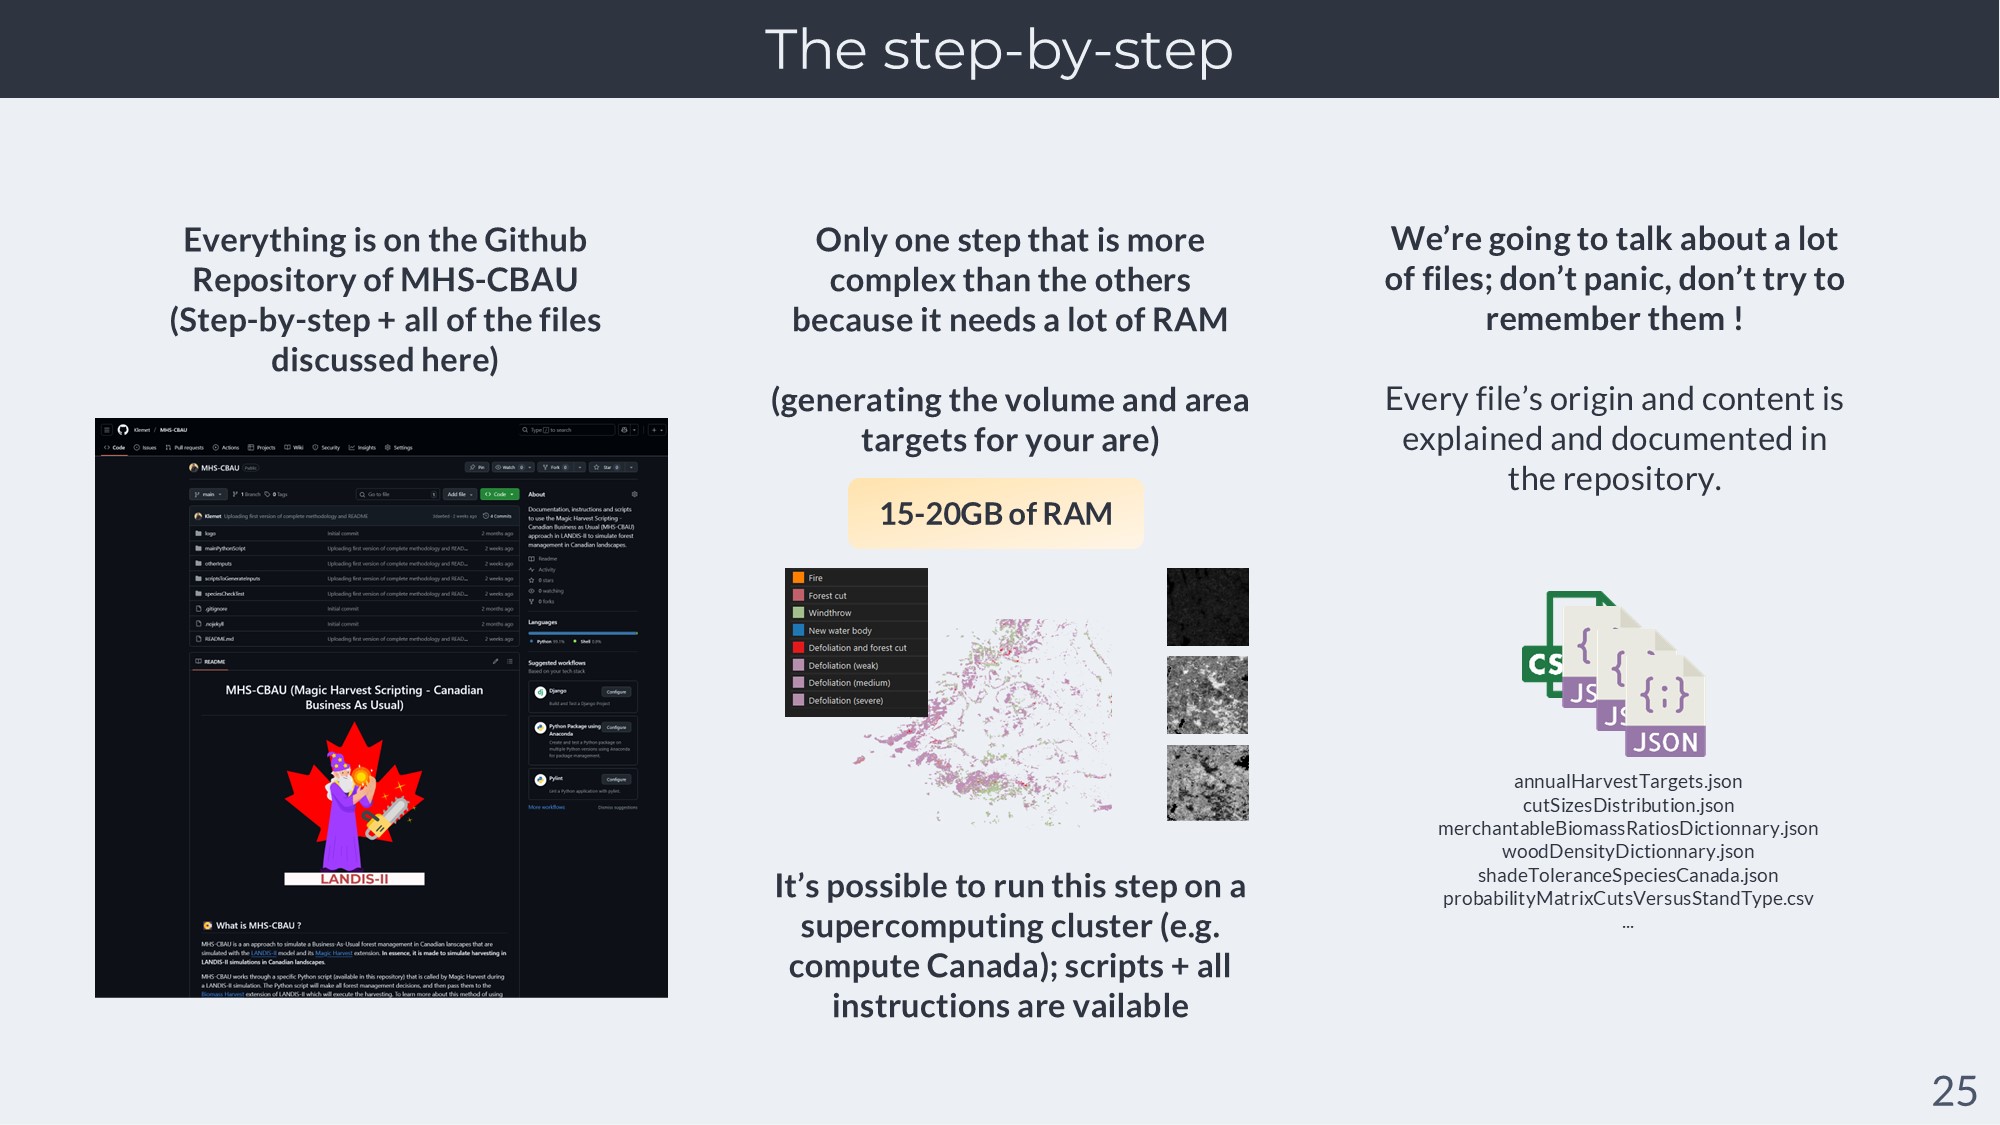
This step by step is written in the README of the Github repository of MHS-CBAU.
All of the files discussed here in the step-by-step are also in the Github repository of MHS-CBAU.
There is only one step in the step by step that is more complicated because it requires a lot of RAM : it’s generating the wood volume and area targets for your area. It’s because it uses a lot of high-resolution maps from federal datasets. But it comes with a way to run it on the computing cluster of Compute Canada/Digital Research Alliance of Canada.
We will talk here about a lot of different files here : don’t panic. My advice : don’t try to remember everything. Today, it’s about understanding the methodology and having an idea of what you will have to do to follow the steps.
Here are the steps, one by one :
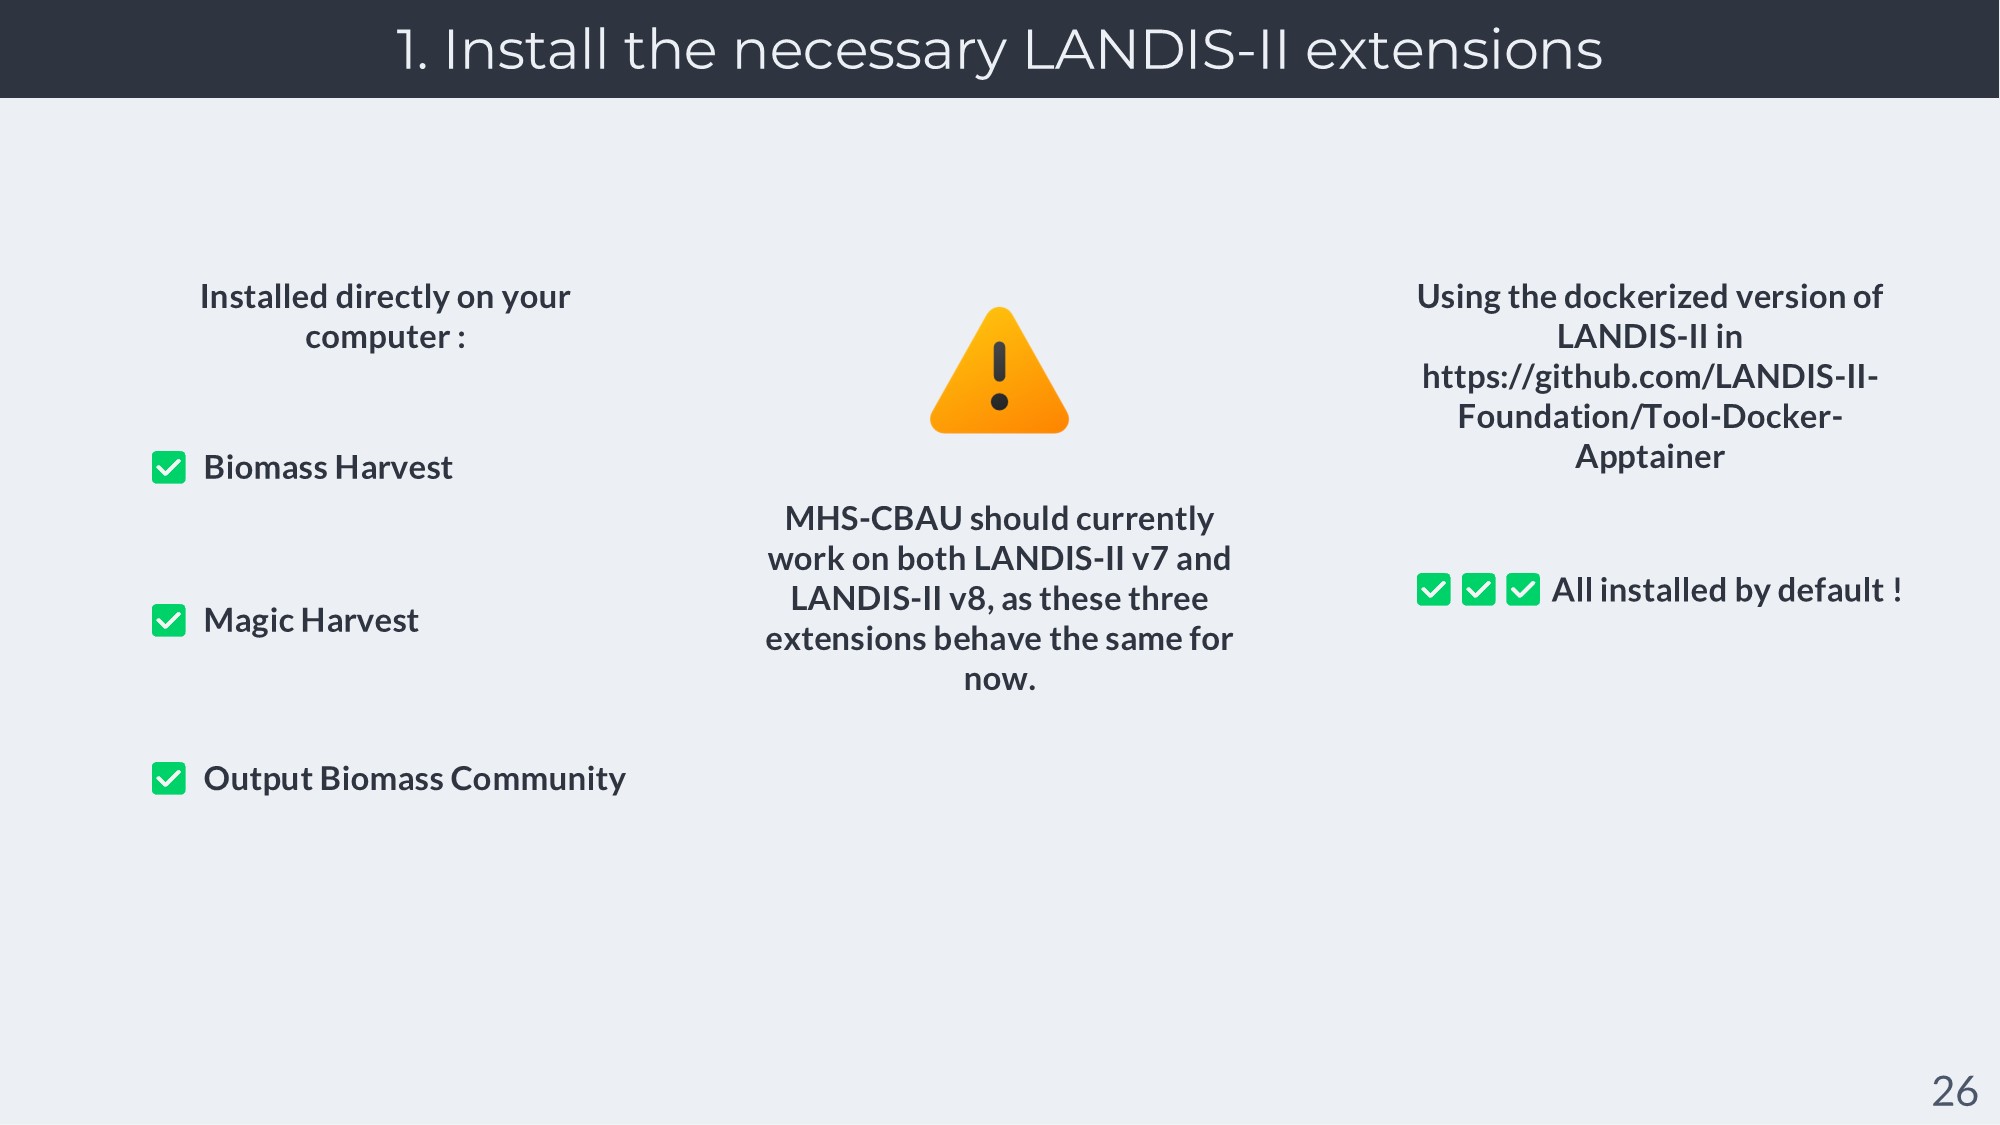
MHS-CBAU requires that you install several extensions of LANDIS-II : (Biomass Harvest, Magic Harvest and Output Biomass Community.
See the Biomass Harvest repository and the Magic Harvest repository and Output Biomasss Community for the installers. The dockerized versions of LANDIS-II already contain both extensions.
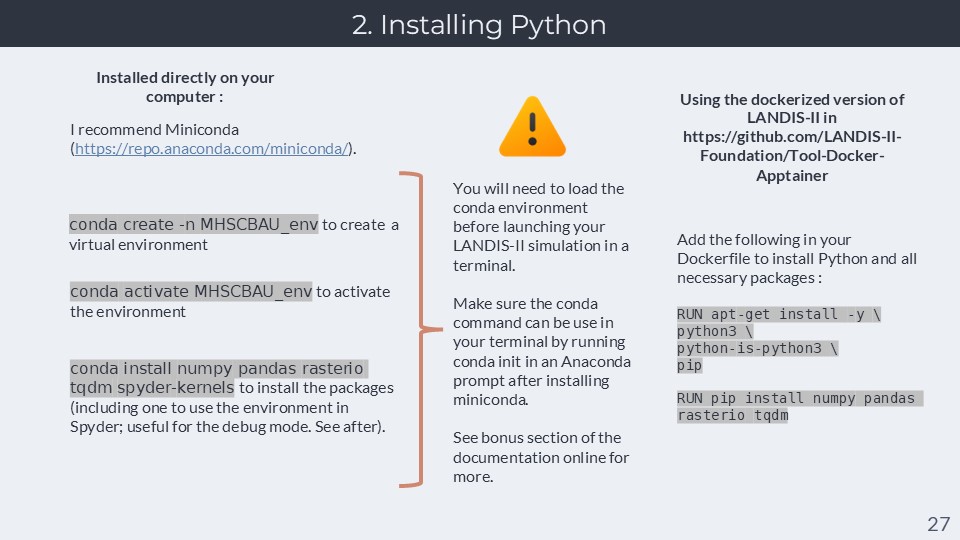
Installing Python : Python is programming language that can be used either as programs, scripts or interpreted through a console (like R). All of the scripts present in this repository are in Python. You will need it to run certain scripts that will generate the inputs for your study area, but also for the scripts that will run during your LANDIS-II simulation. But you need to make sure that you have some of the Python packages installed to run the scripts.
Python is the most popular programming language today in the world, but it’s also more complex than R to use. This is because there are different ways of installing Python and managing its packages, and several potential traps for new users. I’ve done an entire page of the online documentation dedicated to helping you install Python in a stable way on the long term on your computer. I suggest you take a look.
In the meanwhile, to keep this brief : I recommend you download and install Miniconda (the light version of Anaconda, a Python distribution that comes with a package manager and an environment manager). Once downloaded, you can use the conda commands to create a virtual environment, activate it, and then install the needed packages in it. Creating virtual environments like this for each of your projects will avoid many issues with Python on the long term (see bonus documentation); however, you will need to activate the environment before launching a LANDIS-II simulation with MHS-CBAU in a terminal, so that the LANDIS-II simulation can access these packages when it will run the Python scripts of MHS-CBAU. For that, make sure to use the “conda init” command after installing miniconda. For more, check the bonus documentation.
In the meanwhile, if you are using a Dockerized version of LANDIS-II, you can easily install Python and these 4 packages in the base environment of your docker image (no need to create a virtual environment), which will make the packages available to the MHS-CBAU scripts. Here are the commands needed :
RUN apt-get install -y \
python3 \
python-is-python3 \
pip

RUN pip install numpy pandas rasterio tqdm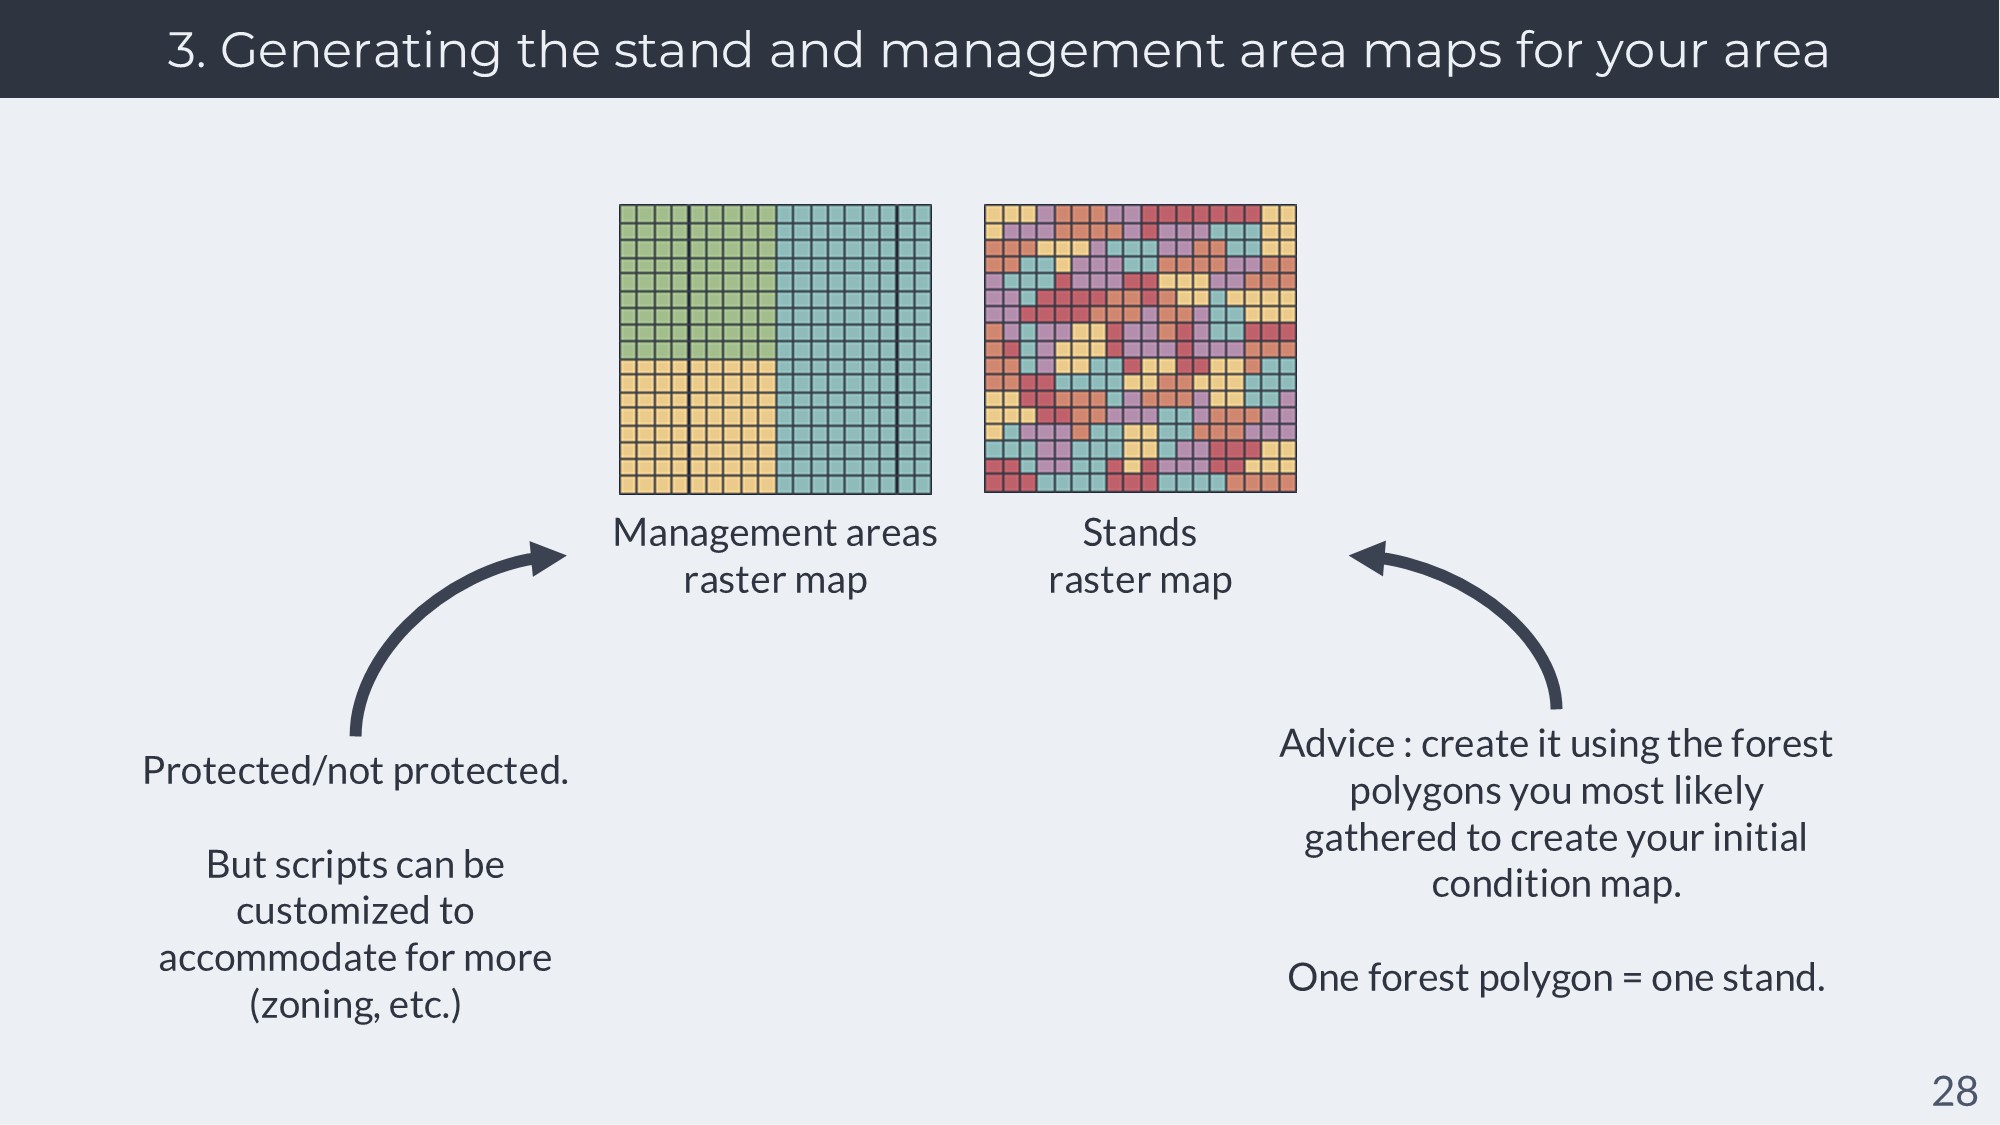
Creating the management areas and stands maps : These maps should be the same as the ones demanded by the Biomass Harvest extention. The way to make these will be unique to your study area, and will most likely easy to create using the finer-scale data (often forest polygons) that you will have used to create the initial conditions of your landscape.
The management area map should be of the same size and resolution as all of your other LANDIS-II maps for your study landscape. Pixels should contain a value that corresponds to the management area they are in. It’s most likely that one of the values you will use will correspond to protected areas (areas without harvesting). Keep that value noted for later. In MHS-CBAU, we only distinguish between protected and non-protected areas; but you can customize the scripts for more nuance or for zoning.
The stand map should also be of the same size and resolution as all of your other LANDIS-II maps for your study landscape. Pixels should contain either 0 (inactive cell), or a number corresponding to the unique identifier of a stand. Therefore, all pixels with the same value will be considered to be in the same cell. However, all of the pixels of a given stands should be in one management area, and not two. You will get errors from the Biomass Harvest extension if you don’t respect this rule. You will most likely create this map using forest polygons used for your initial conditions.
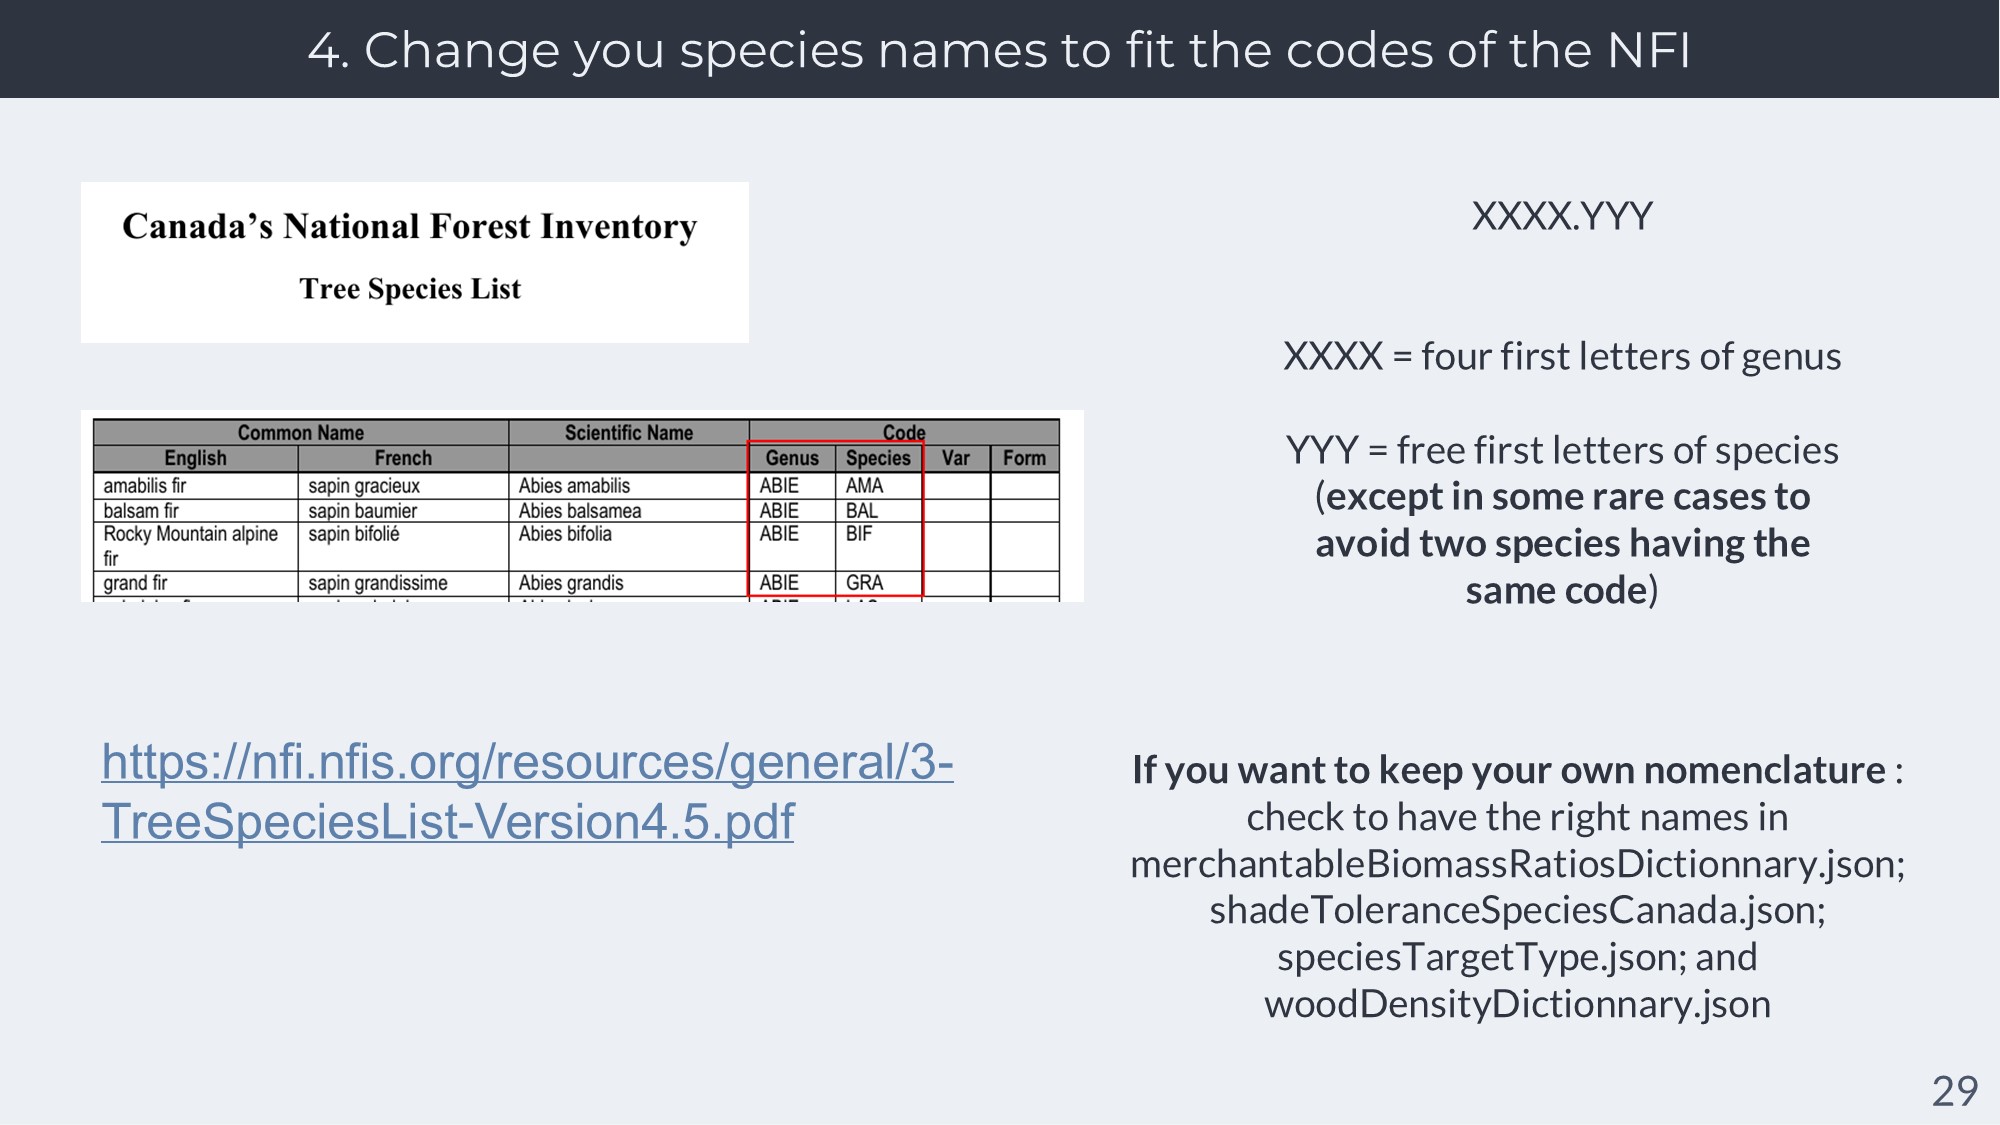
Converting your species name to the NFI terminology : This is to save you time, as the scripts and ready-made parameters in this repository use this format. If you don’t use this format, you will have to edit some files down the road to avoid errors.
The format used by the NFI is described in this document, and is as follow : XXXX.YYY, with XXXX being the first four letters of the Genus in capsize letters (e.g. ABIE for Abies) and YYY being the first three letters of the species name (e.g. BAL for Balsamea). This gives you ABIE.BAL for Abies balsamea, PICE.MAR for Picea mariana, etc.
You will find all of the codes for almost all species in Canada in the document.
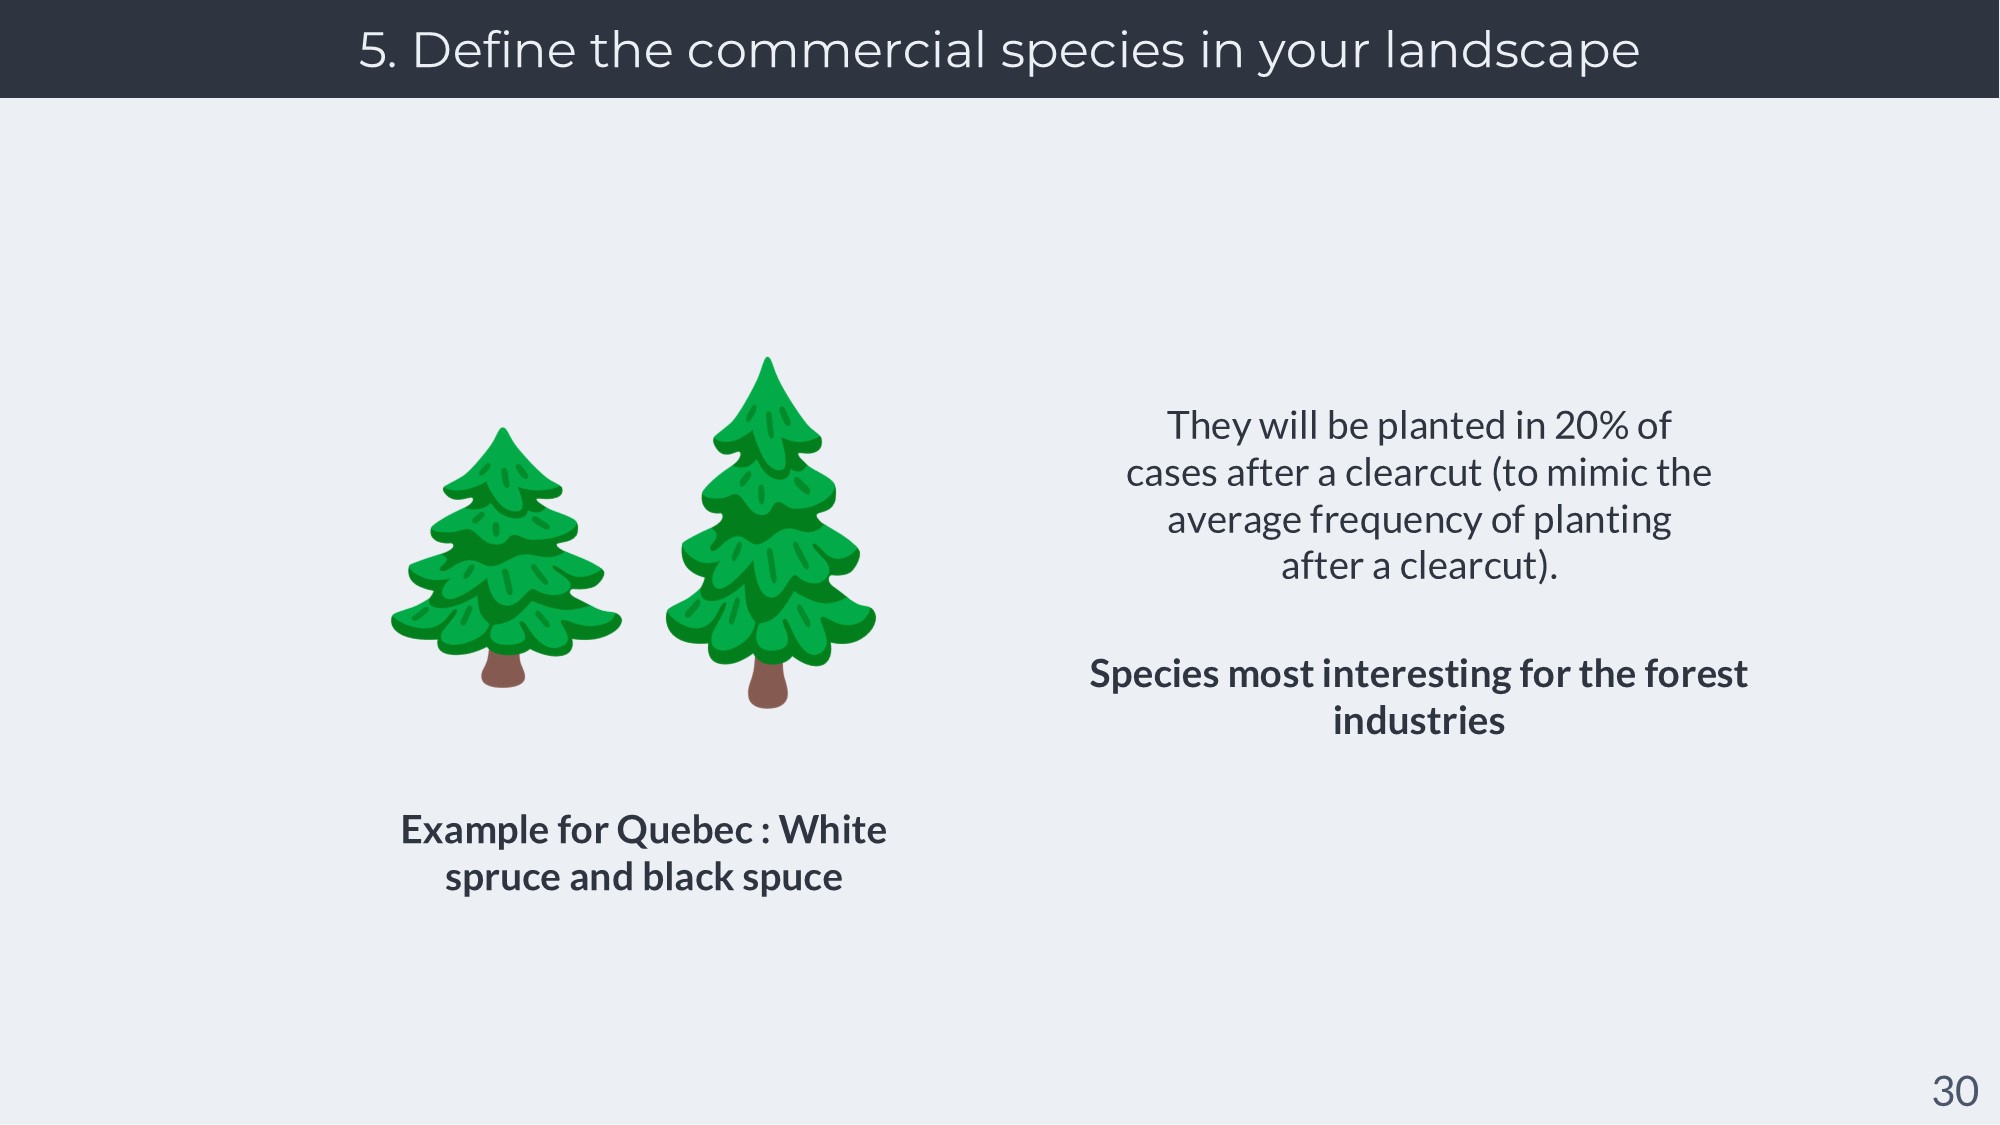
Defining the commercial species in your landscape : These commercial species will be the ones that will be planted in some cases after a clearcut in the MHS-CBAU algorithm. These species must be the most interesting species commercially for forest industries.
For example : in Quebec, these would mostly be white spruce and black spruce (PICE.MAR and PICE.GLA according to the format of the NFI; see above).
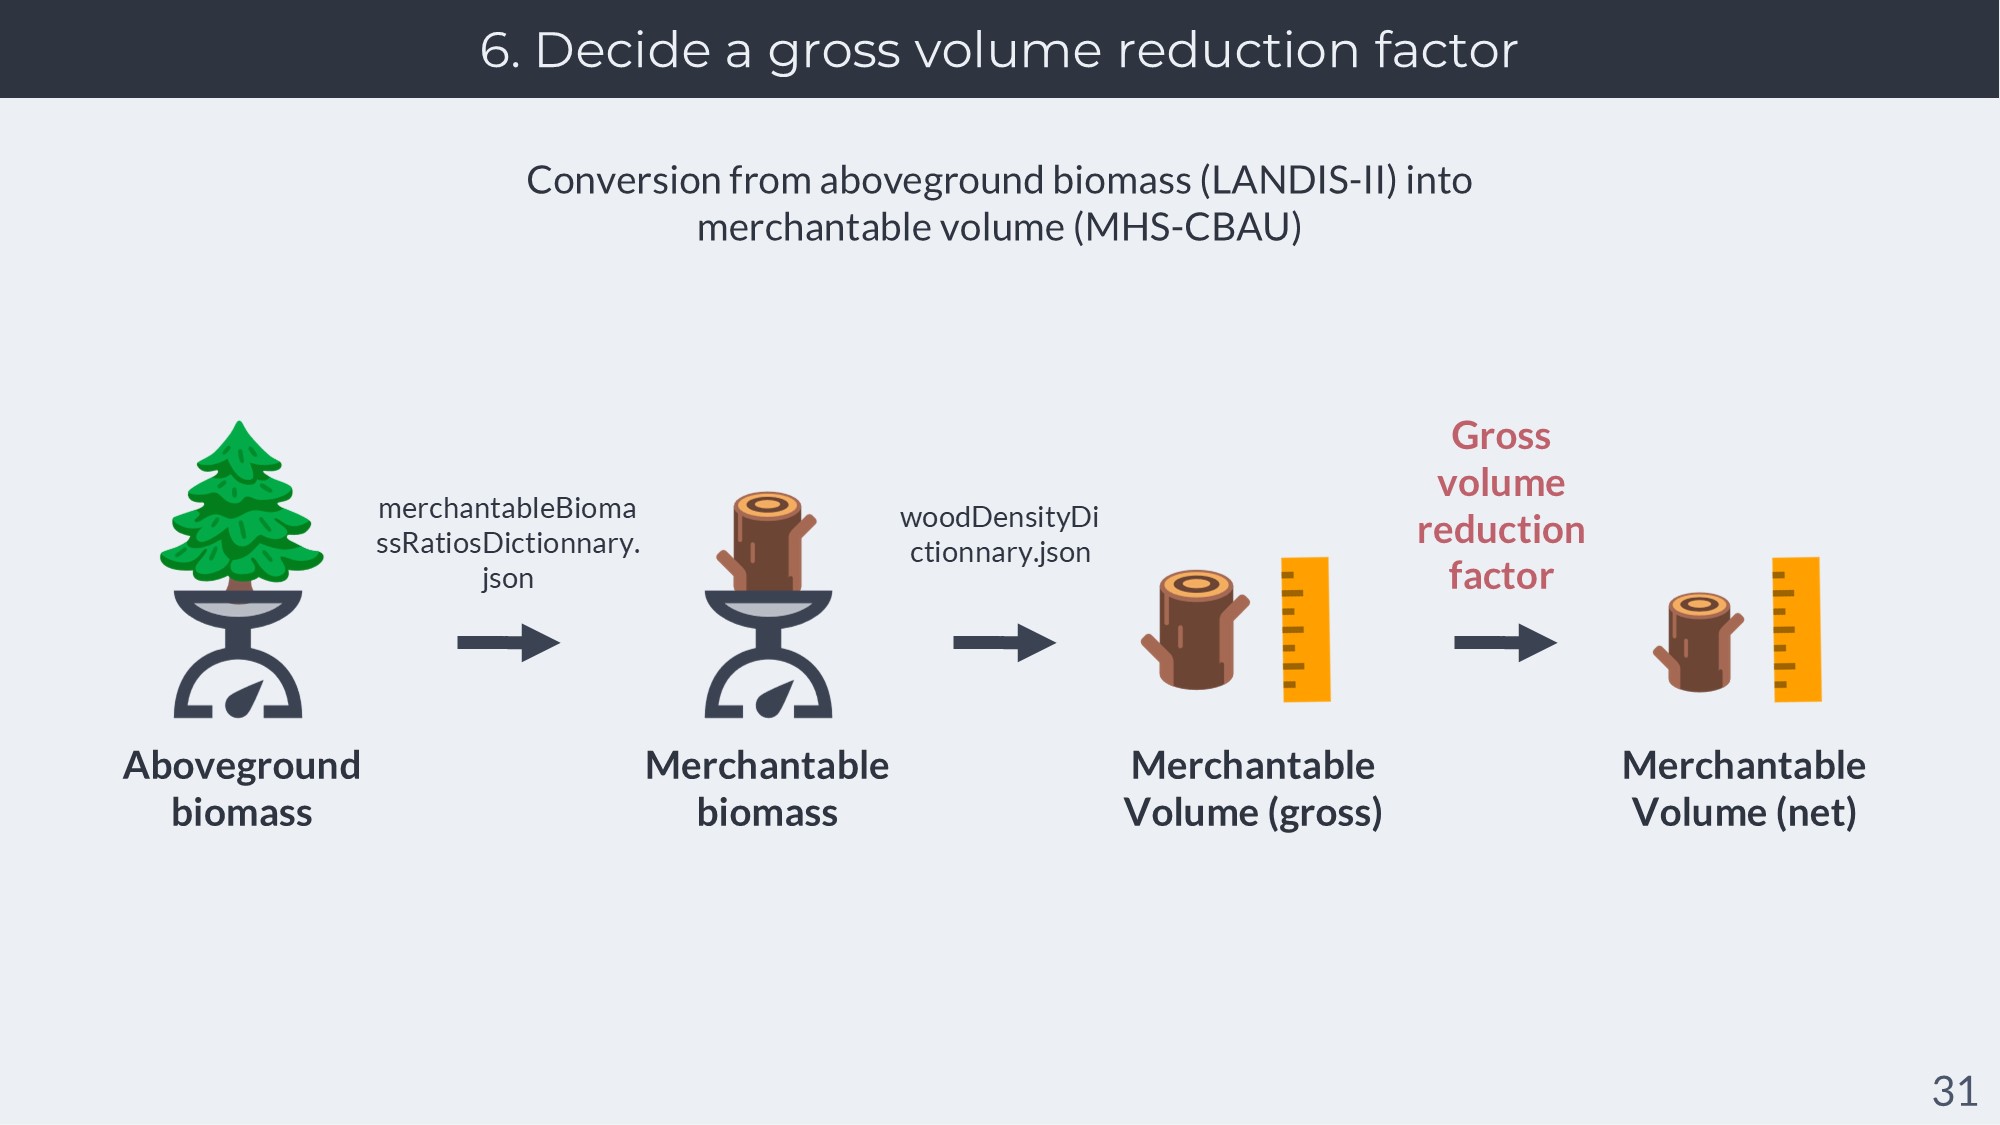
Deciding a gross volume reduction factor : LANDIS-II computes the aboveground biomass of the age cohorts (in weight of biomass). In contrast, MHS-CBAU works by estimating the merchantable volume of the age cohort from the above ground biomass. It compares these merchantable volume to “merchantable volume targets” for the timestep, which are based on reported harvested volumes in Canada (from the National Forestry Database of Canada).
MHS-CBAU converts the aboveground biomass of LANDIS-II to merchantable volume so using three conversion factors : a ratio of merchantable versus total aboveground biomass; the wood density of the species; and a further reduction factor that accounts for wood that is, in the end, not used by the industry because of defects or other reasons. While the merchantable biomass ratios and wood density will be automatically generated by the scripts of the repository (see below), you can adjust this reduction factor yourself.
I recommend using a reduction factor of 7% (0.07) based on the data we have from Quebec on this gross-to-net reduction (see here). You can also change this ratio by species.
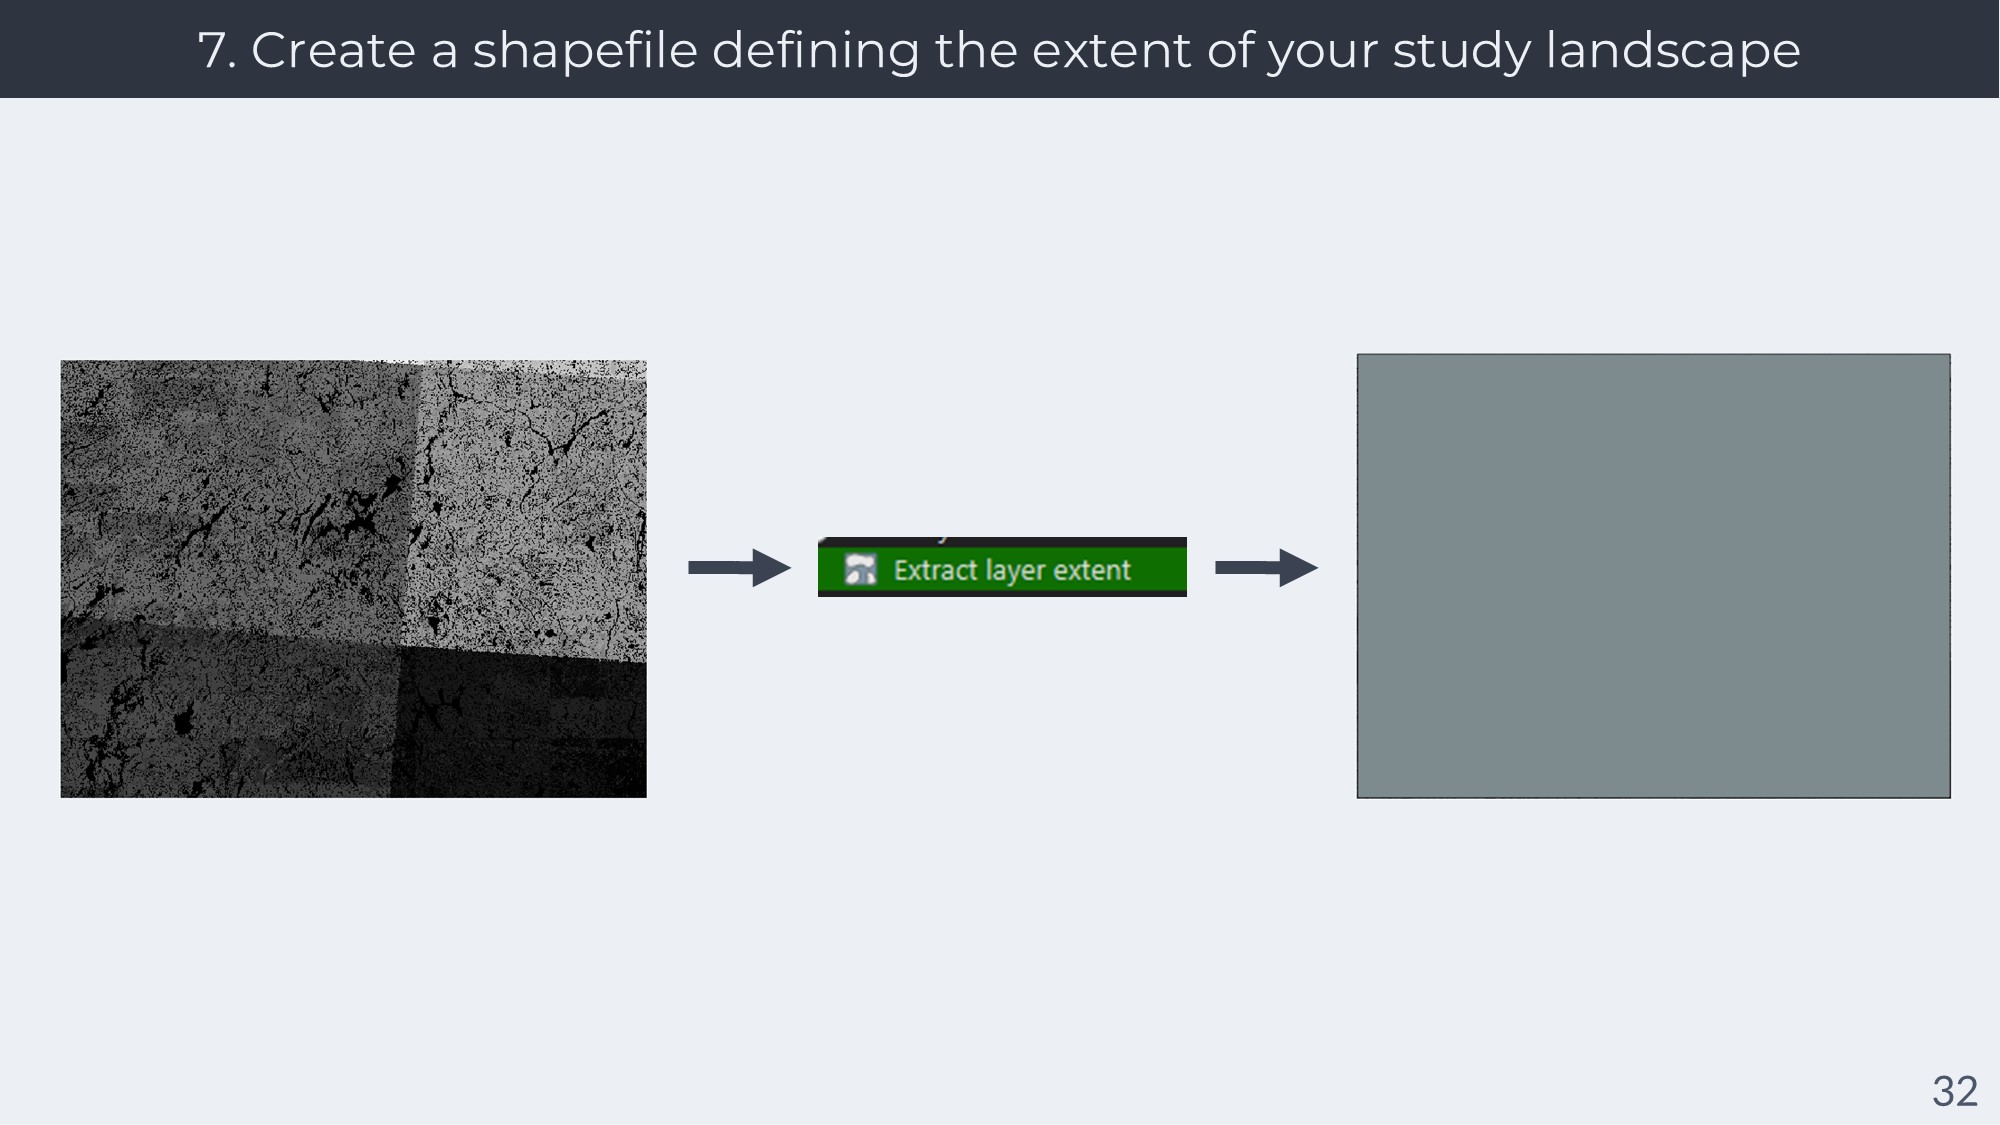
Creating a shapefile defining the extent of your study landscape : You can use QGIS to do this. As much as possible, be certain that this extent is the same extent as the raster maps you are using in LANDIS-II.
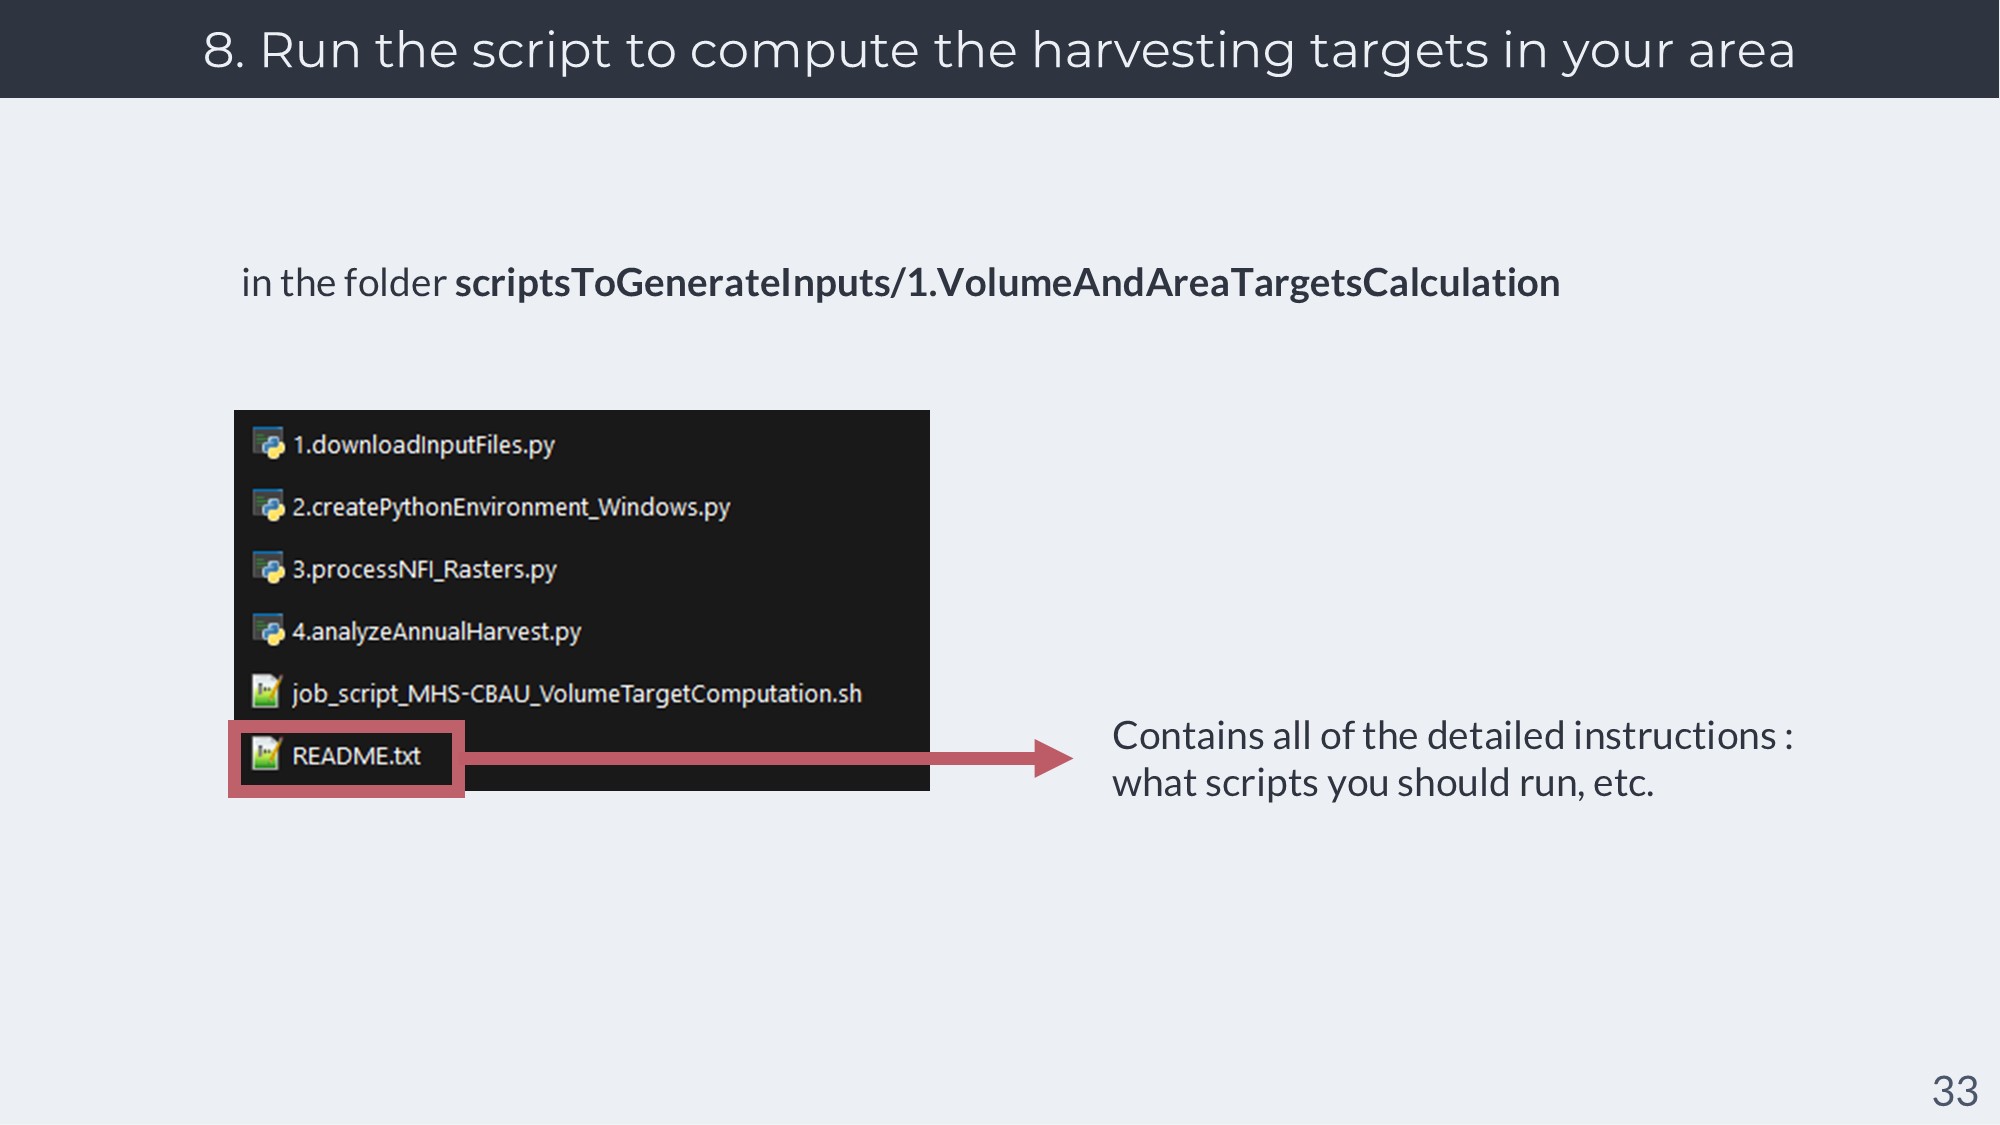
Running the script to compute the harvesting targets in your area : The scripts are located in scriptsToGenerateInputs/1.VolumeAndAreaTargetsCalculation.
You will find a README.txt file containing all of the instructions you will need to run the scripts.
I will describe the methodology of this script quickly here :

The scripts use three federal datasets : CanLAD (which are 30x30m raster maps showing the forest disturbances detected from satellite every year throughout all of Canada); the NFI biomass rasters (250x250m raster maps showing the variation of biomass through all of Canada for 2001 and 2011); and the National Forestry Database (dataframes containing the reported values of harvested wood volume for softwoods and hardwoods in all provinces in Canada throughout different years).
Also, the script needs to know where your study landscape is, so you have to provide your study landscape in shapefile format.
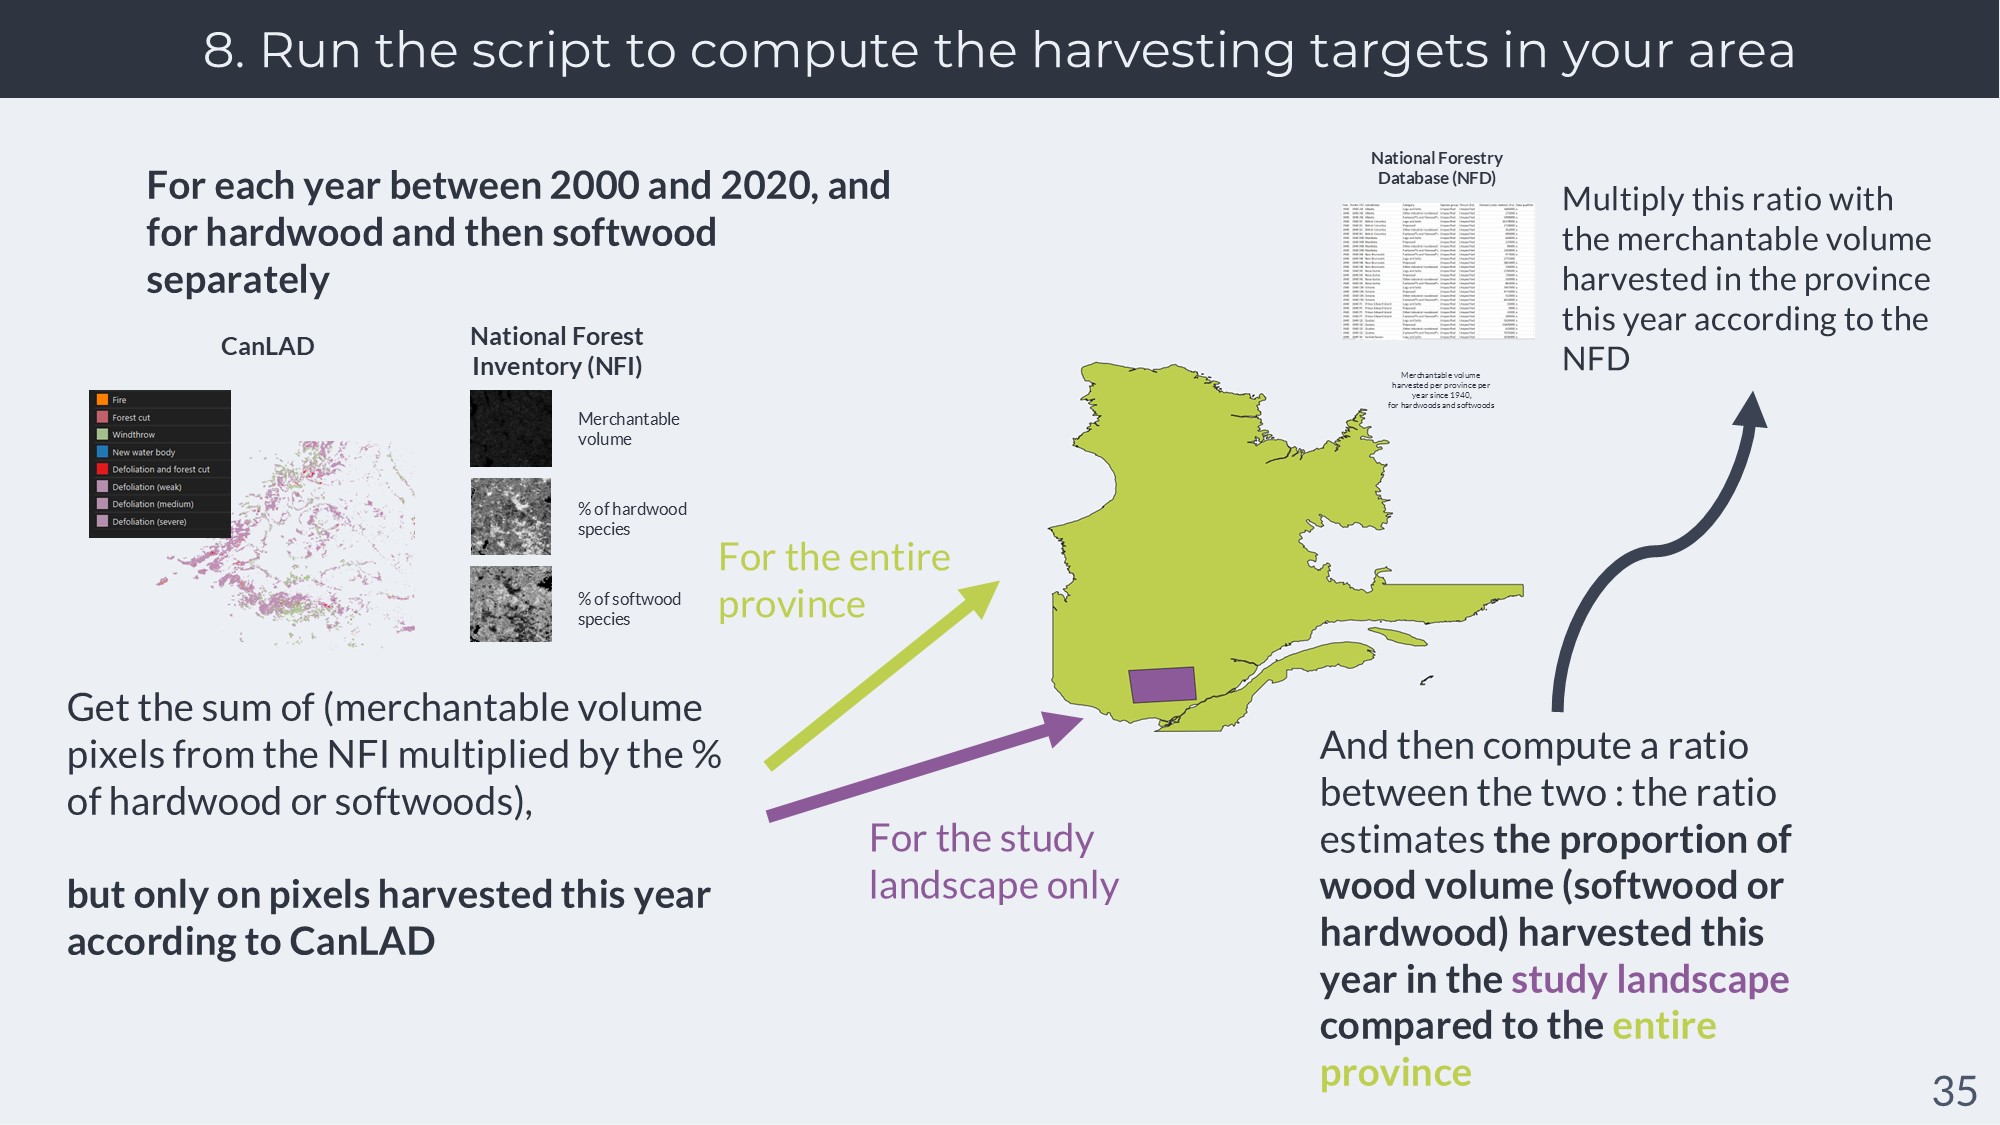
What the script is going to do is use these datasets to estimate the volume of hardwood and softwood trees harvested year by year in your study landscape.
To do this, it’s going to get the value harvested in the province where your landscape is for the year; then, it’s going to combine information from CanLAD and from the NFI biomass rasters to estimate the amount of biomass of hardwoods and softwoods harvested in your study area versus the one harvested in the province.
The script will then do a ratio of the volume harvested in the whole province versus the one in your study landscape; for example, 17% of the biomass harvested in Ontario in 2018 might have been harvested in your study landscape. The script will then multiply this ratio with the volumes harvested in the entire province, which then gives us a pretty good estimate of the volume harvested in your study landscape.
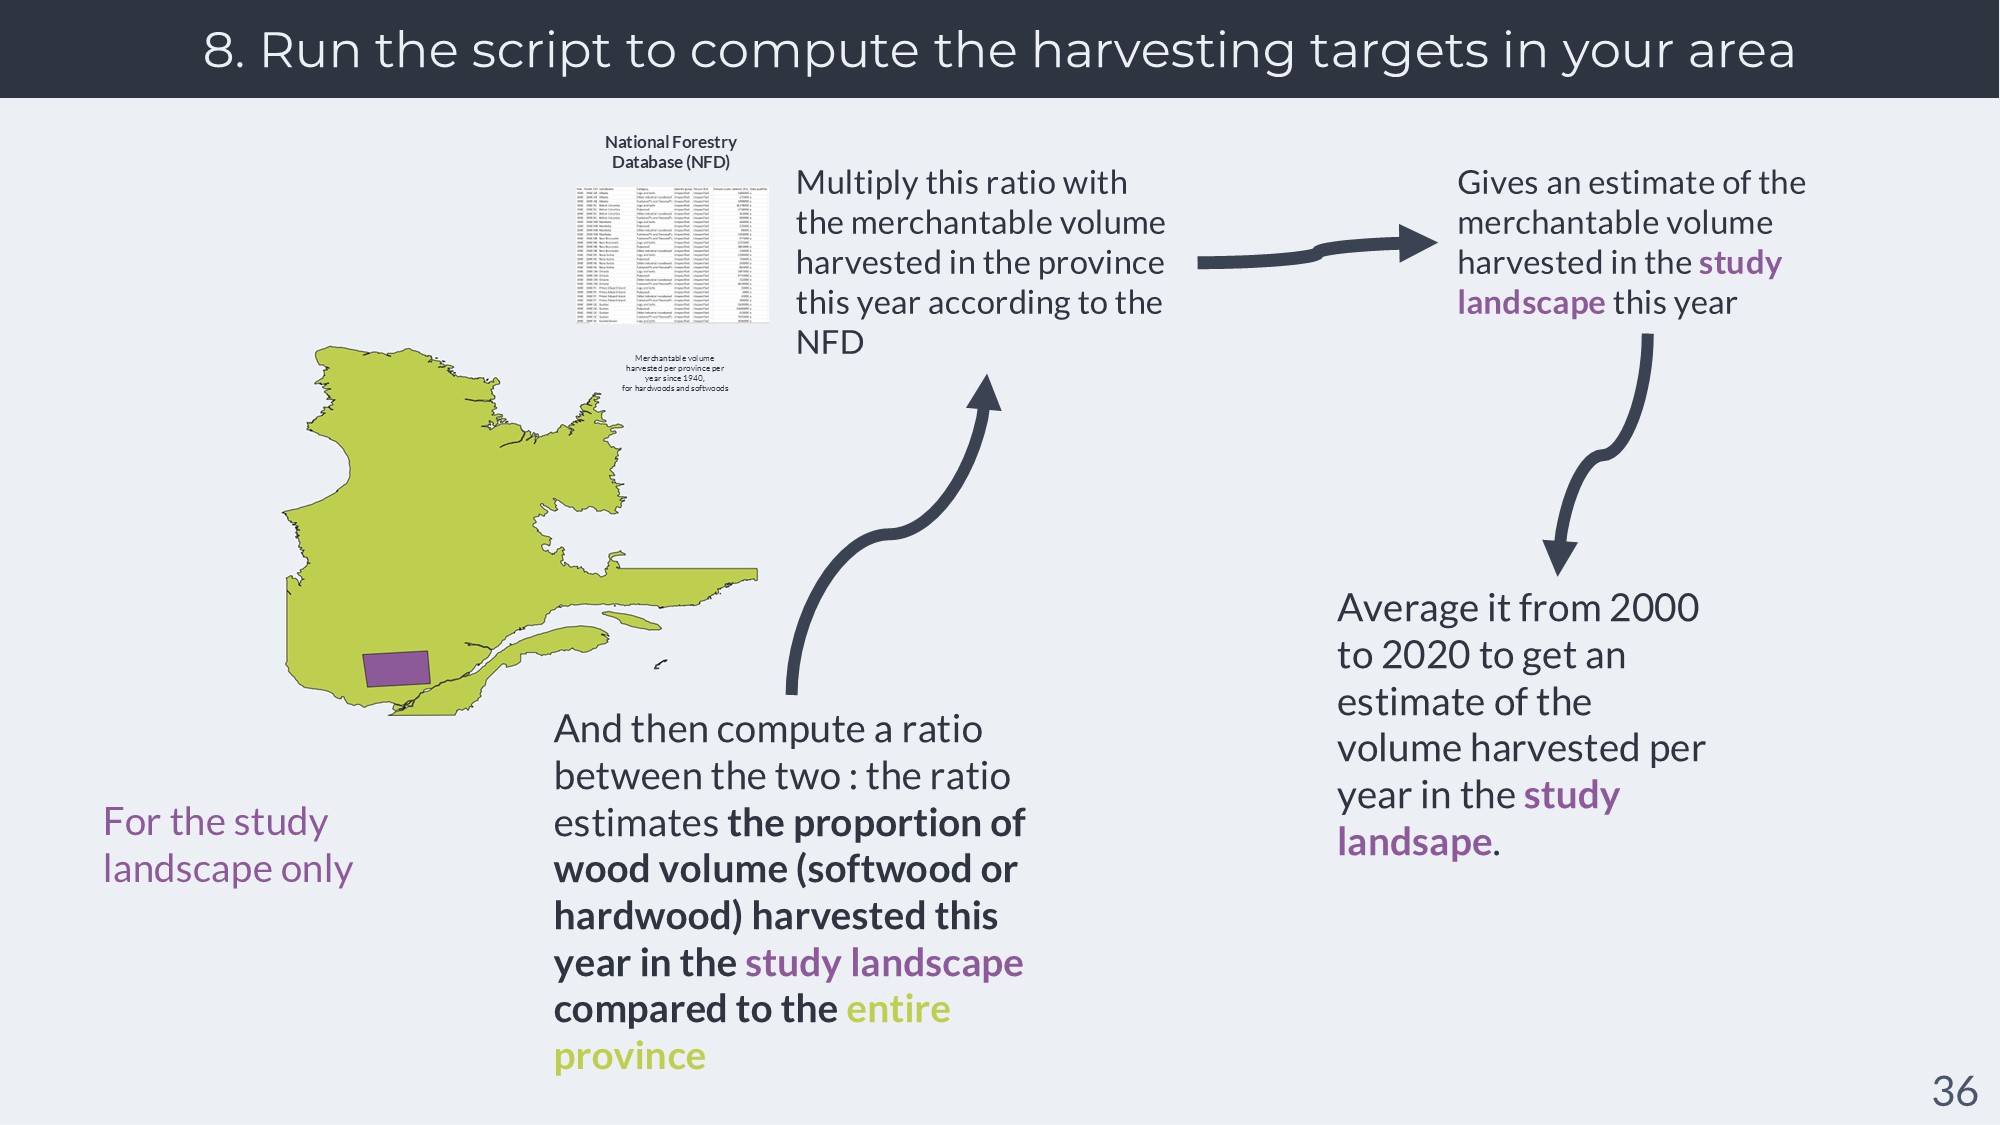
The script will then derive this estimate for the year 2000 to the year 2020, every year; and then do an average across all years.
This average for each of the wood category we use (softwood and hardwoods) then becomes the wood targets for your landscape.
Note that we’re talking about merchantable wood volume, meaning woods harvested in the province and then used by sawmills and factories, because that’s the one reported in the National Forestry Database.
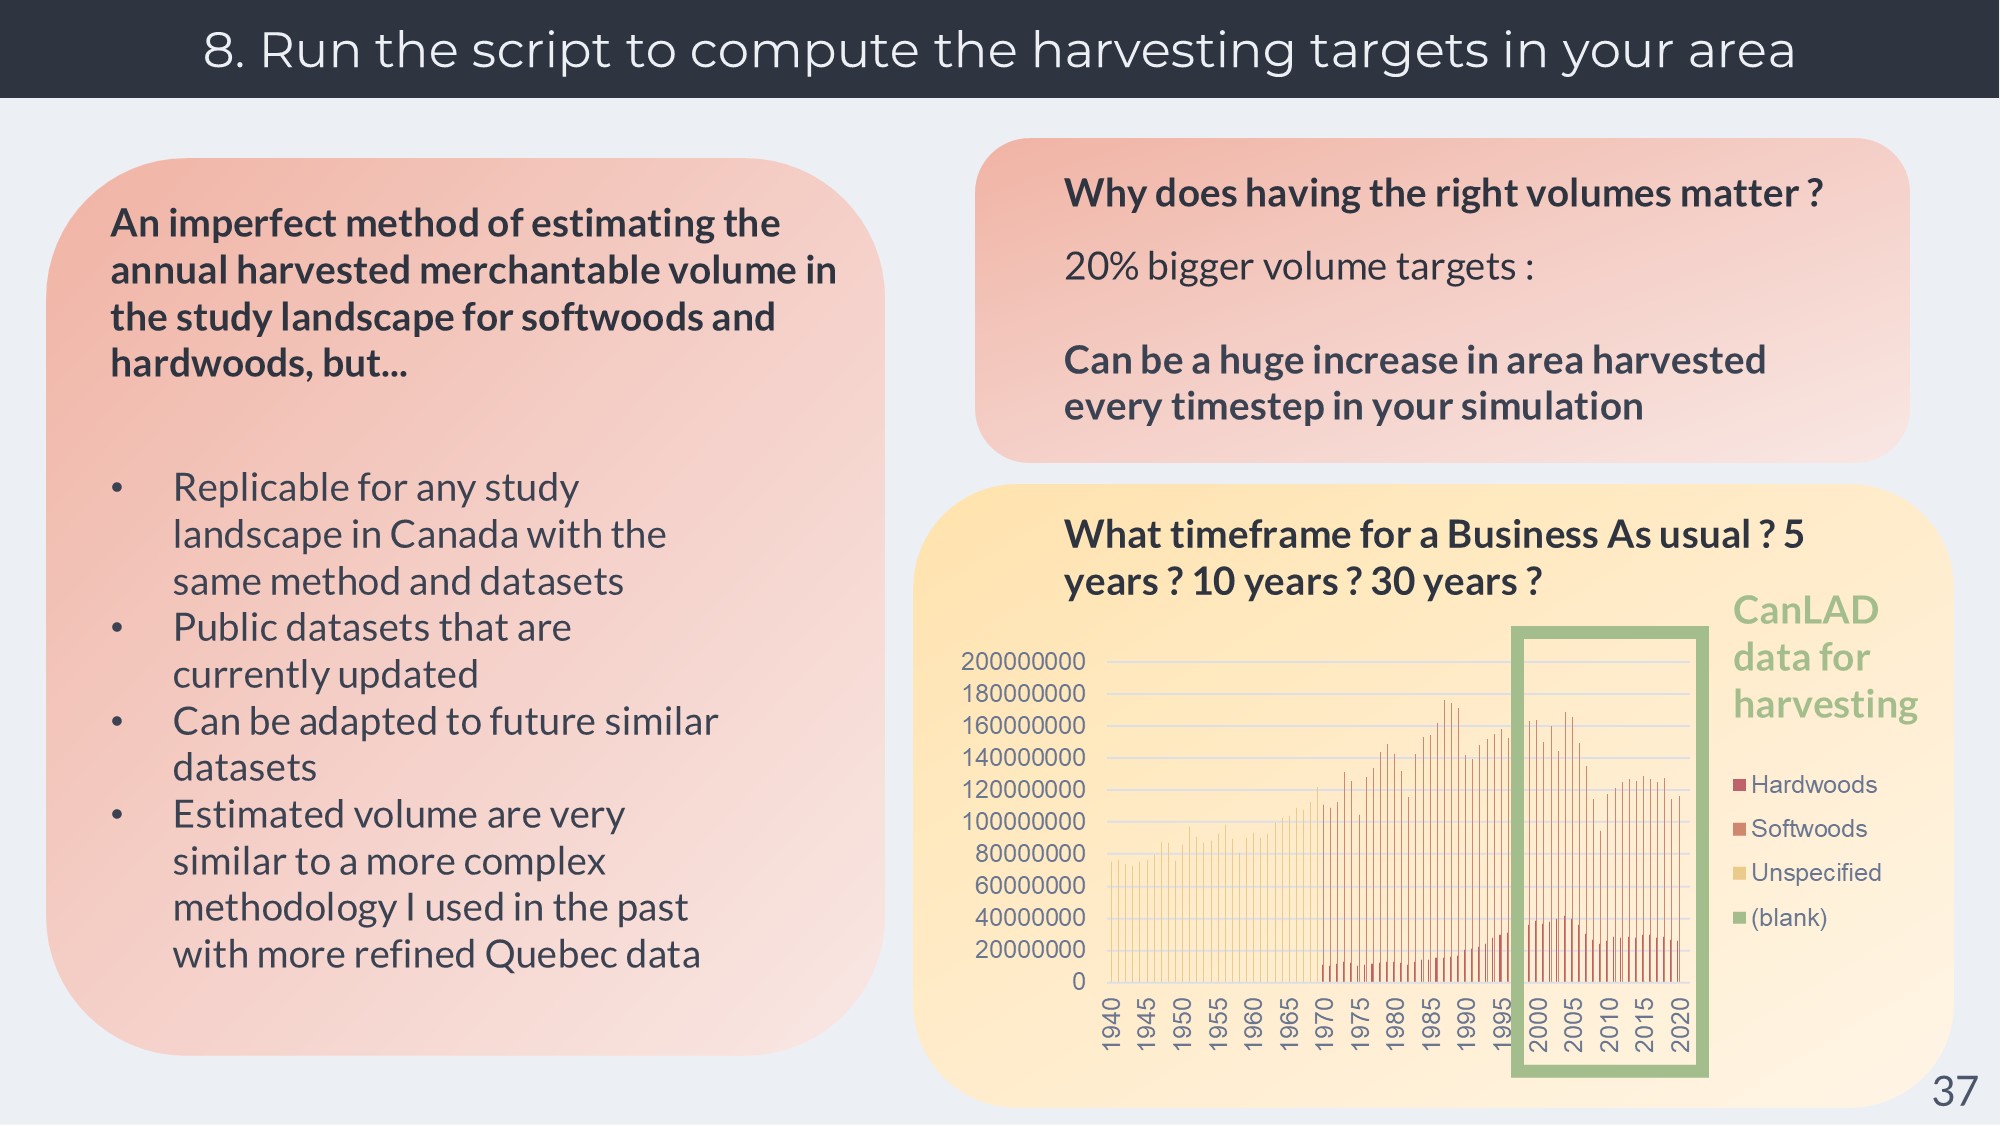
As you can see, this is not a perfect method because of several caveats :
CanLAD does not always detect cuts (especially partial cuts)
the NFI biomass rasters are only for 2001 and 2011, even though we want to look at other years than these two, which will result in a temporal mismatch
ideally, a biomass ratio should not be translated directly into a volume ratio, because the relation of biomass to volume can change depending of the species you’re talking about.
But after a lot of researching, thinking and testing, this is the best compromise I found to allow you to derive these volume targets easily. Using federal datasets allow us to derive data for all of Canada easily, with a replicable and scripted methodology. And through testing, I’ve seen that the numbers obtained with this methodology were quite similar to those I got with previous attempts during my PhD thesis and my post-doc work that used more complicated and precise methods.
Why does it matter so much that we get the right volume targets ? Because it’s going to influence harvesting in your landscape very heavily; 20% bigger targets means 20% more cuts in your landscape !
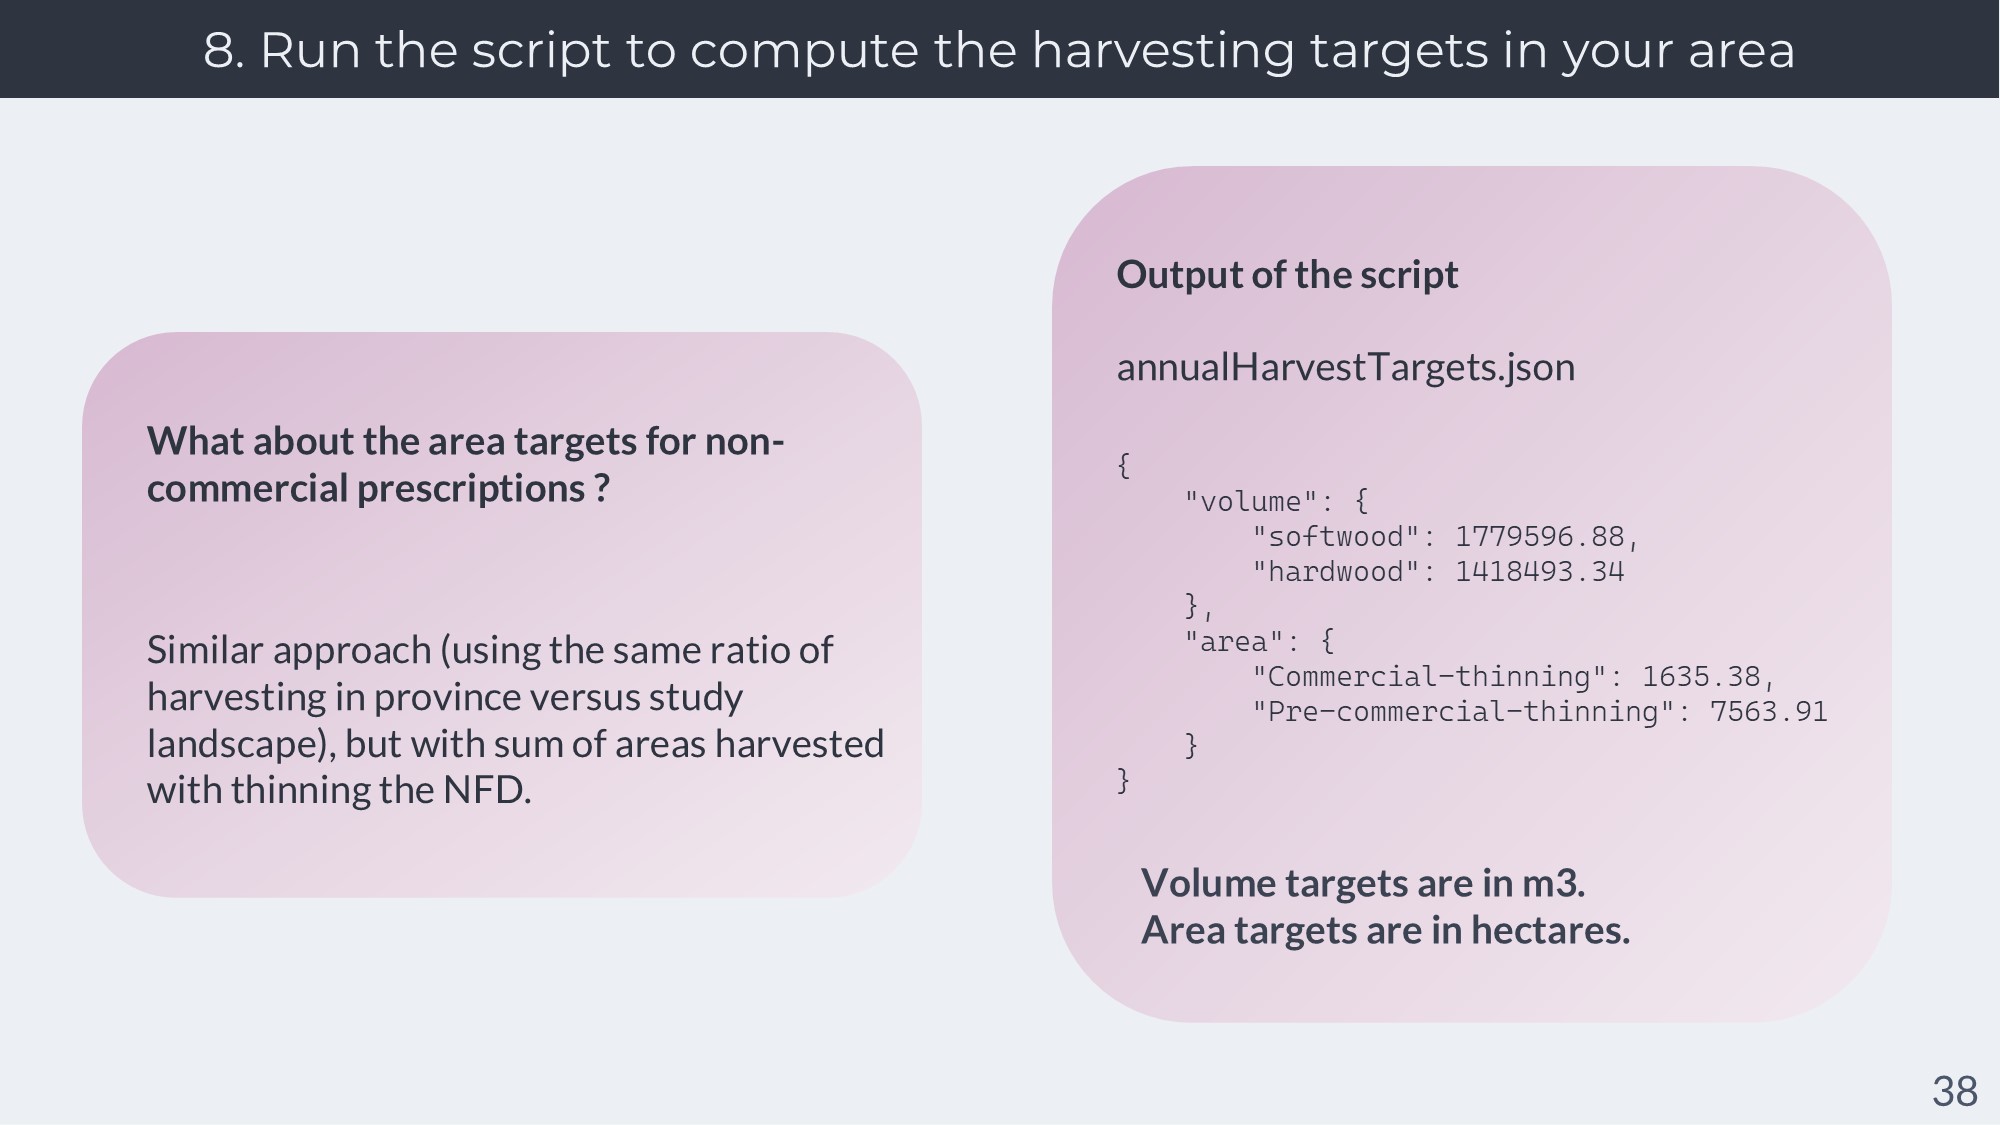
For the area targets for non-commercial prescriptions : the same script takes care of it, and the approach is similar – except we multiply the ratios computed between the whole province and the study landscape with the area harvesting with thinning. This gives us an estimate of the area harvested with thinning in the study landscape for each year, which we can average.
The scripts will output a file named annualHarvestTargets.json. Here is what it will look like. Keep this file at hand. Also keep in mind the units used in it : the main MHS-CBAU python script is adapted to used these units.
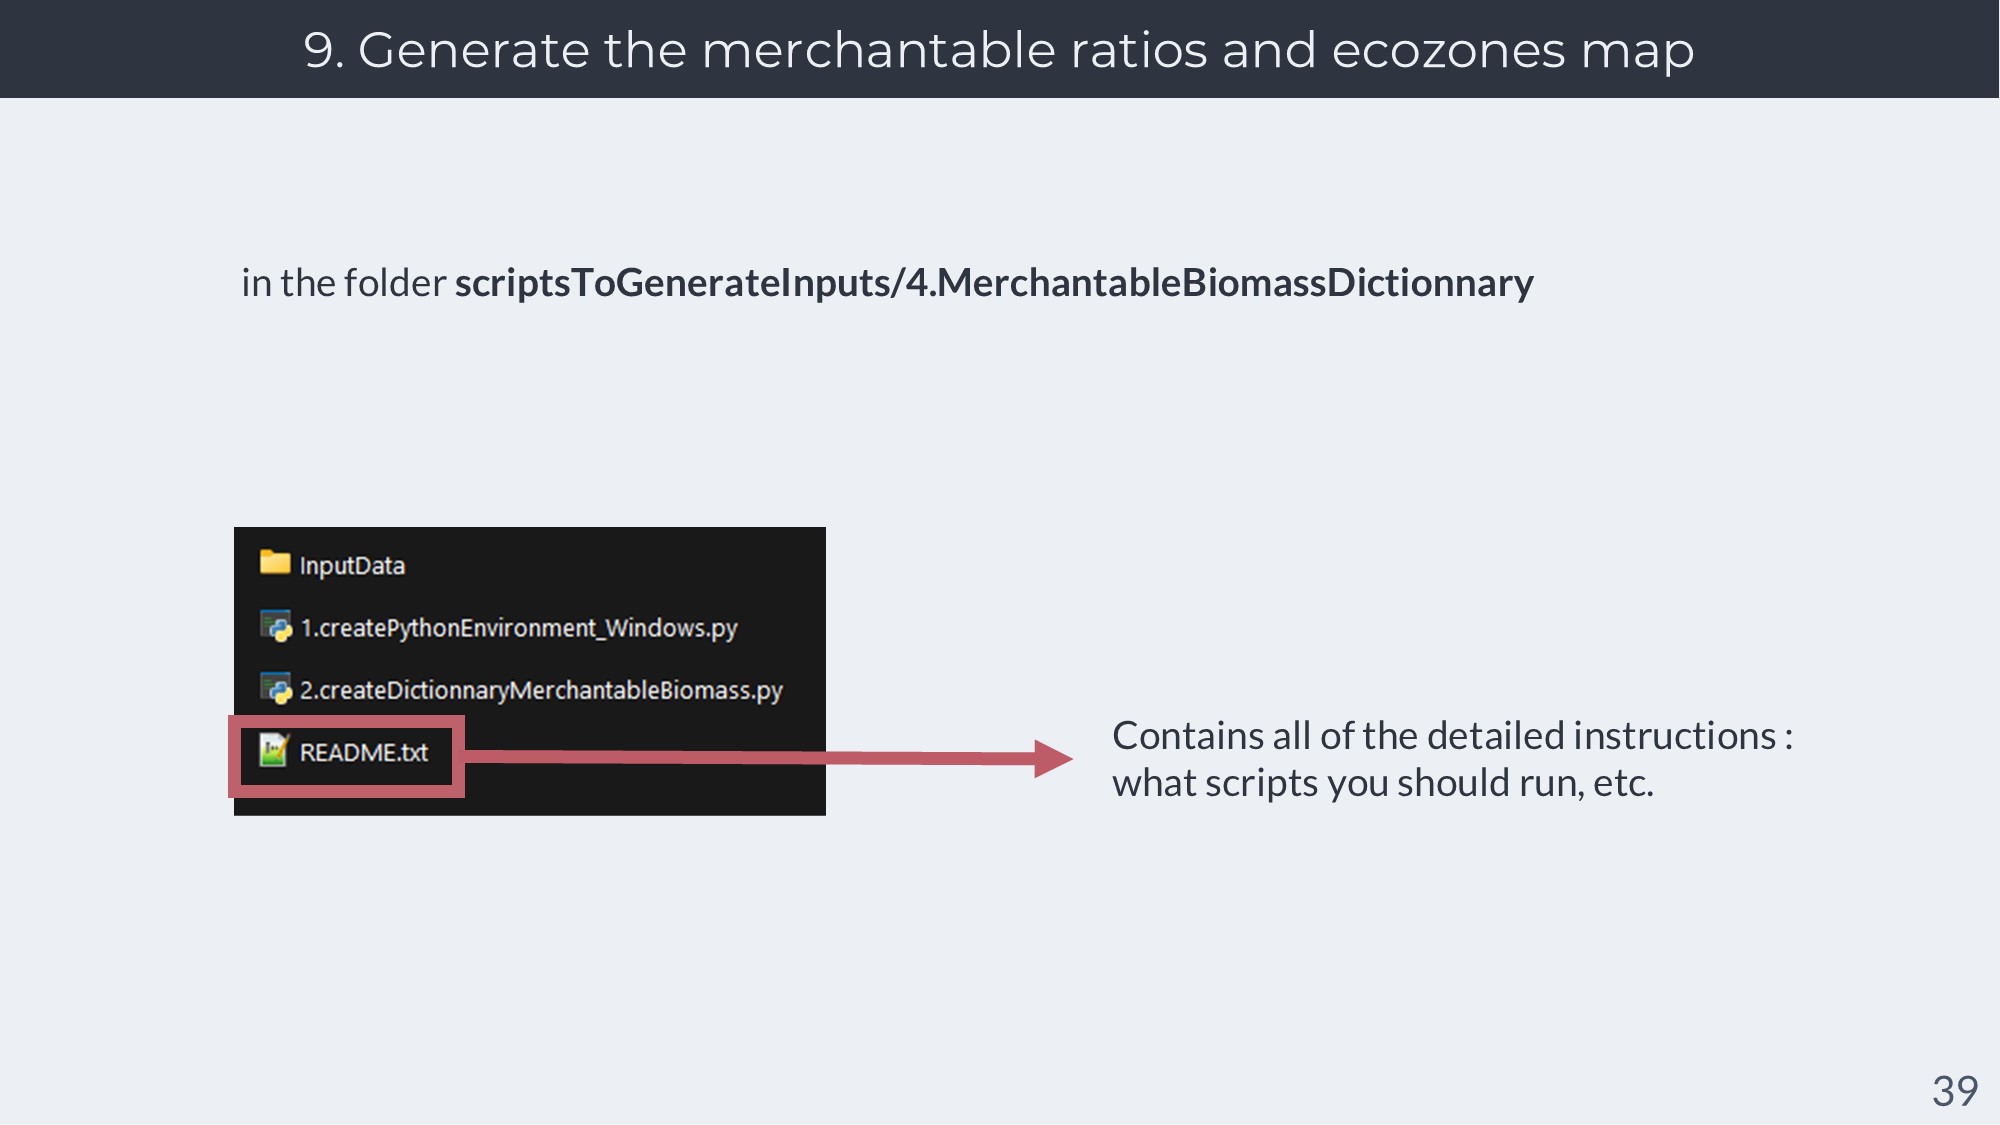
Generating the merchantable ratios and ecozones map : The scripts are located in scriptsToGenerateInputs/4.MerchantableBiomassDictionnary. You will find a README.txt file containing all of the instructions you will need to run the scripts.
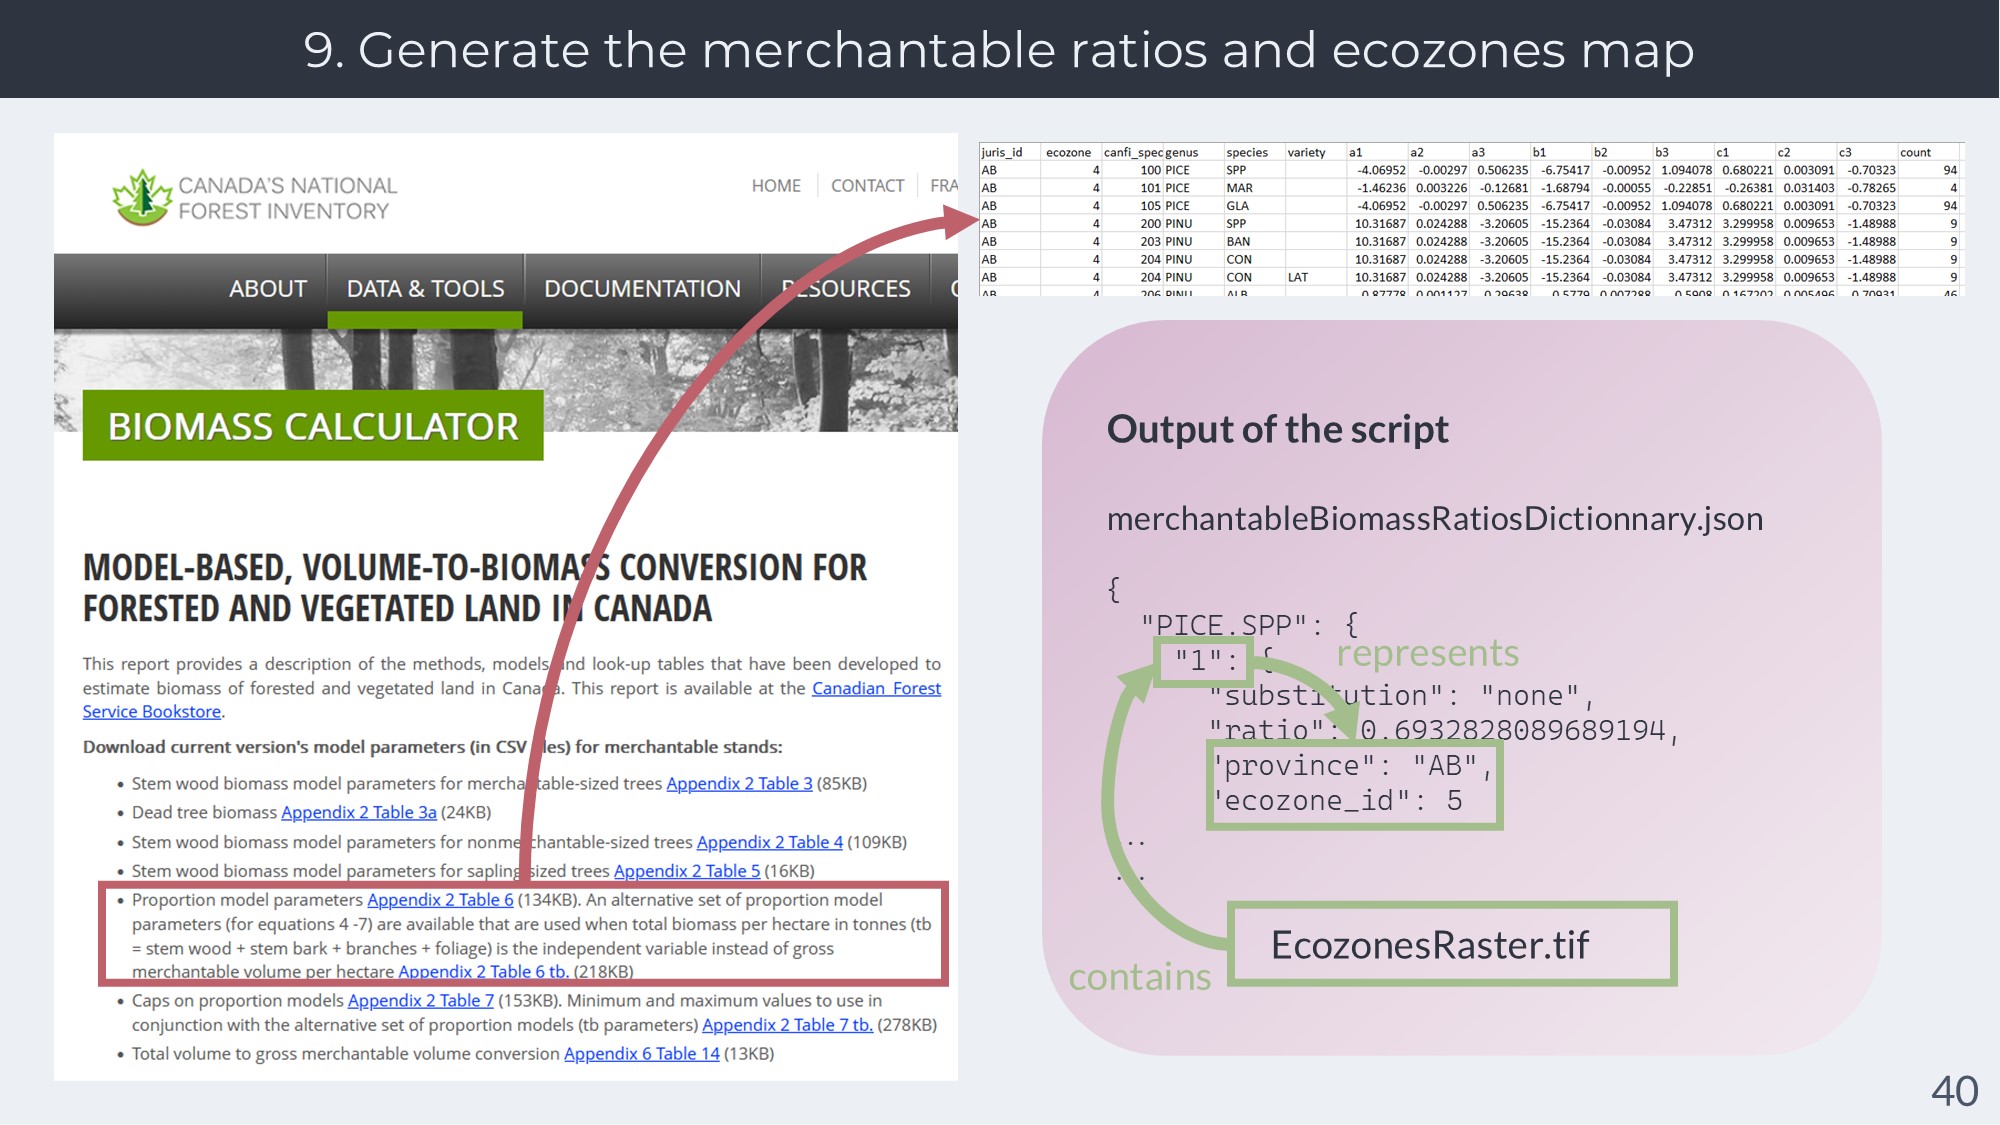
To be quick : these ratios are gathered from tree biomass models used in the National Forest Inventory of Canada. These models are statistical models that can estimate the relative biomass of different part of the tree : Trunk, bark, branches and leaves. By looking at the trunk only, we get the merchantable part of the tree. These statistical models have parameters that change for each province and ecozone of Canada; sometimes, the parameters are not available for a certain species in a certain place for Canada (not enough real-life measures to make the parameters). In that case, the parameters are substituted for another ecozone/province nearby.
The scripts will output two files you need to keep at hand : EcozonesRaster.tif, and merchantableBiomassRatiosDictionnary.json.
The ecozone raster (EcozonesRaster.tif) contains a special ecozone ID representing a combo of ecozone/province so that we can get the right ratio for your species depending on where it is in Canada. The ecozone raster is made to have the same size as the other raster maps of your LANDIS-II simulation to make things easier. Again, don’t confuse it with your “Ecoregion raster”, which is a raster needed by your LANDIS-II simulation. I’m sorry that the terms are confusing.

Preparing the Output Biomass Community parameter file : The Output Biomass Community extension is vital to making the scripts of MHS-CBAU work. This extension outputs two files at each time step - a csv file and a raster file - which contain the composition of your LANDIS-II landscape in the same format as the initial condition raster and csv/text file you use to initialize LANDIS-II.
The MHS-CBAU script will read these file in order to get the current state of the landscape at each time step.At the time of writing this, Output Biomass Community doesn’t have any parameter except from the timestep at which it runs. Therefore, just write a text file with the following :
Replace X with the timestep you are using for Magic Harvest and Biomass Harvest (it must be the same timestep).
The output files of Output Biomass Community are very large, but the MHS-CBAU script has some lines to remove these files once the timestep is over. You can edit the parameter DELETE_COMMUNITIES_FILES in MHS-CBAU_MainScript.py to change this.
Be certain to write in your LANDIS-II scenario file that your scenario should use Output Biomass Community.
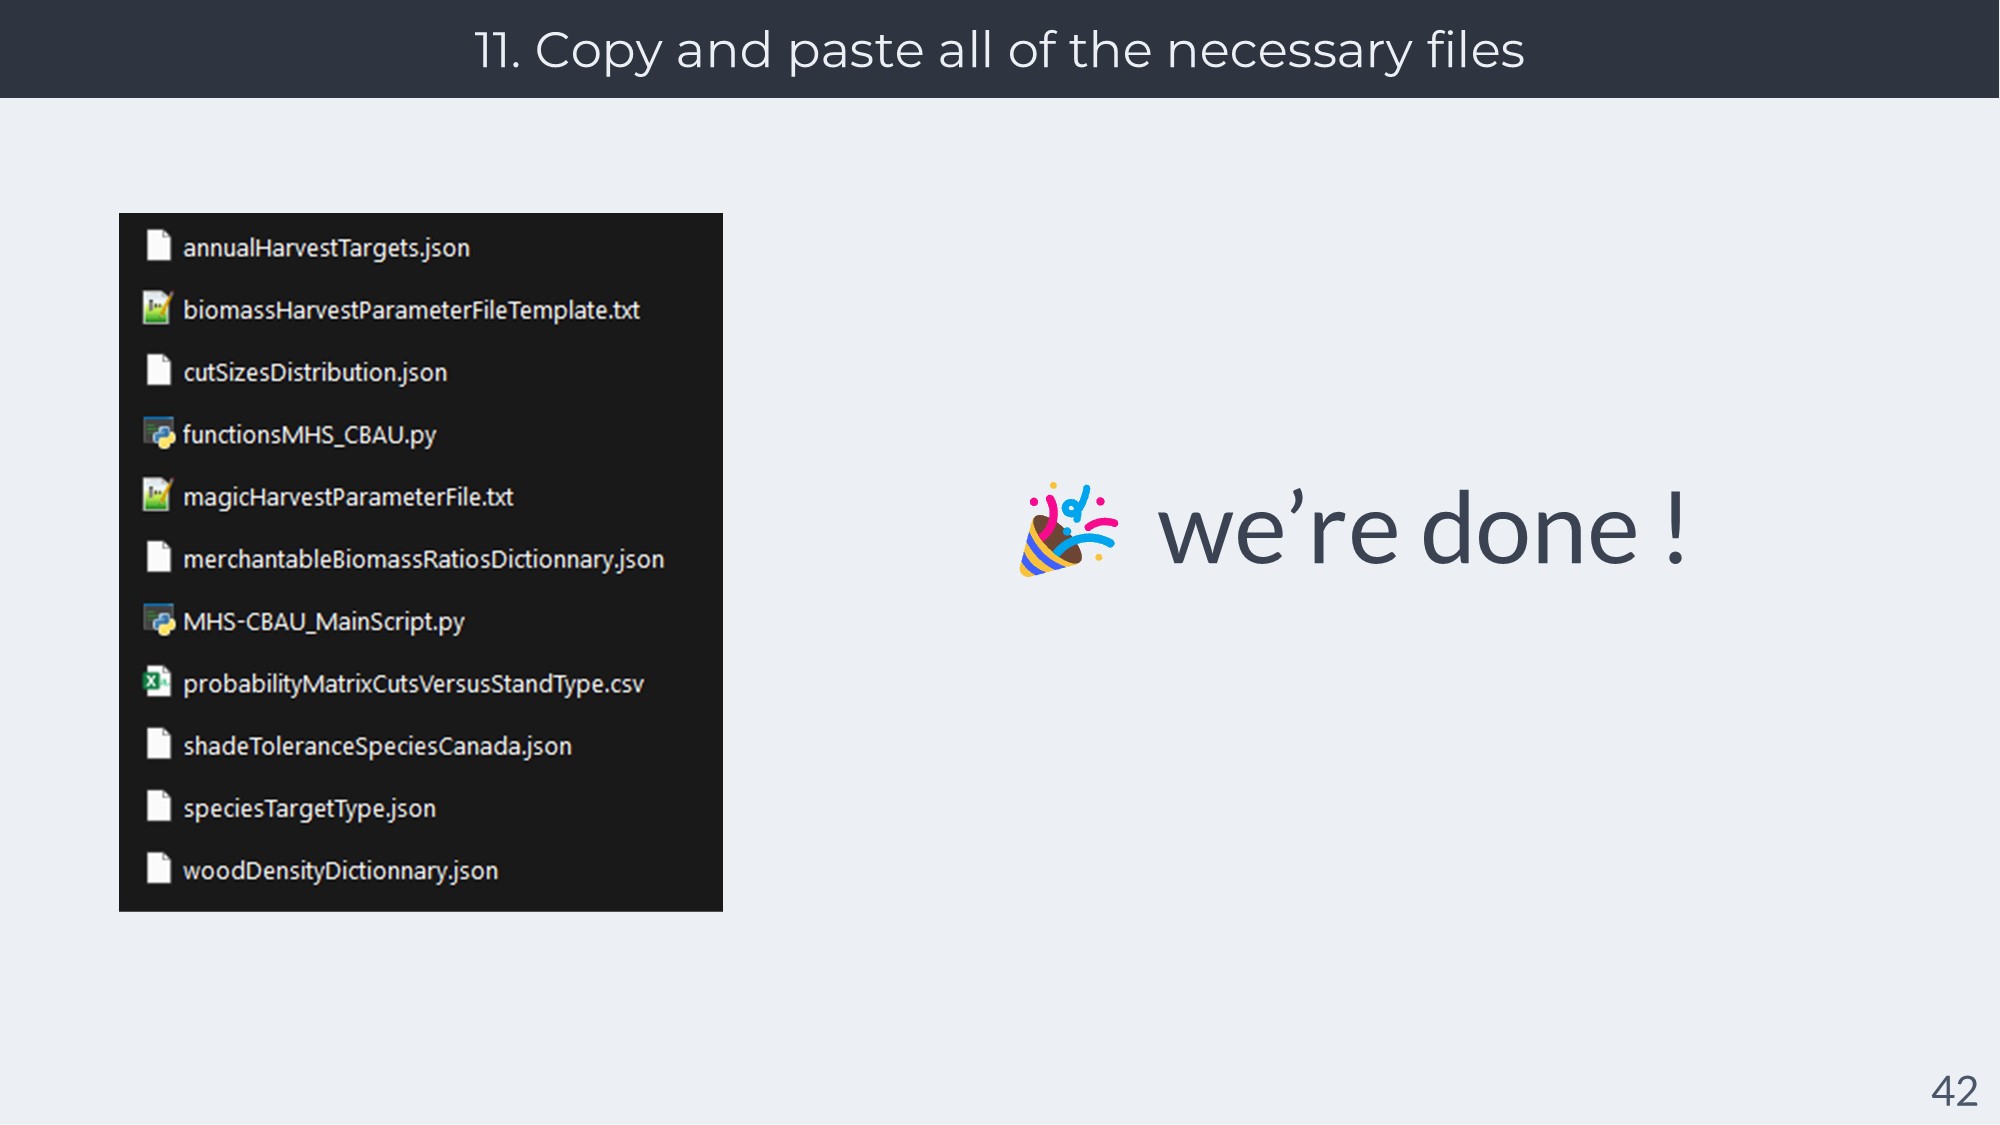
The last step is simply copying/pasting all of the files pre-generated or generated at the last steps into your LANDIS-II simulation folders.
The way you will copy and paste this files will depend on how your organize your LANDIS-II simulation files. Just make sure that all of the files noted here are available to your LANDIS-II simulation.
In my case, I usually create a folder in /inputs/disturbances/harvesting-MSH-CBAU/ in my LANDIS-II simulation files.
I will not give the precise instructions here for each/copy paste; but they are in the readme of the repository.
💡 If you also want to use the Forest Roads Simulation extension, be sure to call it right after Biomass Harvest in your LANDIS-II scenario file.
An that’s it, we’re done !